Monday, March 14, 2011

March 10 - Polymers

We started this week's class with a mini lesson on pi and circles. March 14th is Pi Day (3/14 - 3.14) so I thought it would be fun to talk about that for a few minutes.
We talked a little about the number pi: it's an irrational number meaning it will go on infinitely without repeating. So far, mathematicians have been able to use super computers to calculate more than two billion digits of pi. This long strand of digits actually made pi fit in nicely with today's lesson; polymers also form long strands.

In case you're curious, here are the first million digits of pi.
http://www.piday.org/million.php

We talked about how we use pi to find the circumference and area of a circle. The circumference is pi multiplied by the diameter while the area is pi times the radius squared. You will end up with pi any time you divide the circumference of a circle by its diameter. It does not matter how big or small the circle is.

Pi Unrolled animation:
http://commons.wikimedia.org/wiki/File:Pi-unrolled_slow.gif

More information on pi:
http://www.historyforkids.org/scienceforkids/math/geometry/pi.htm

http://www.faqkids.com/161-what-is-pi.html

March 14th is also Albert Einstein's birthday. He was born on March 14th, 1879. We spent a little time talking about Einstein. He was awarded the 1921 Nobel Prize for Physics and, in 1955, the 99th element of the periodic table, Einsteinium, was named after him.

More information on Albert Einstein:
http://www.biography.com/bio4kids/bio4kids-einstein.jsp

Polymers
Polymers are really quite fascinating. We encounter them on a daily basis but may not know it. As simple as that plastic bag or piece of PVC pipe may seem on the outside, the chemistry of those objects is pretty complex.

We've looked at the periodic table several times in this class. Each of the symbols stands for one atom on that element. So, if we just wrote down H, it would stand for one atom of hydrogen. Atoms can join with other atoms to form molecules. That one atom of hydrogen could join with another atom of hydrogen to form H2, one molecule of hydrogen. If we added one atom of oxygen to that molecule of hydrogen, they would form H2O or water. I drew pictures on the board to show these bonds.
Water is a relatively small molecule but some molecules are really big. Vitamin C, for example, is written as C6H8O6. That's 20 atoms! I drew a vitamin C molecule on the board and then told the students we could move those 20 atoms around a bit and, while we'd still have six atoms of carbon, eight of hydrogen, and six of oxygen, it would not be vitamin C. How molecules are bonded determines how they act and react. We'll get into chemical reactions more next week.

A polymer is a chain of many molecules that join together. Scientists call each of those molecules monomers. I wrote the words polymer and monomer on the board and explained that mono means one and poly means many. Some polymers are linear polymers meaning they join together to form a long chain. Others are branched polymers; these have a chain with lots of branches coming off it.

Types of polymers
Polymers can be natural or synthetic. Natural polymers include rubber; starch; glucose (the sugar formed by plants as a product of photosynthesis); wood; chitin (found in the shells of shellfish, exoskeletons of bugs, and the cell walls of mushrooms); and proteins in foods as well as your skin, hair, and fingernails.
Synthetic polymers often come in the form of plastics. These include PVC (polyvinylchloride), nylon, Styrofoam (polystyrene), polypropylene (#5 plastic), and polyethylene (#2 plastic).
Click here to see how monomers join together to form polymers.
Teflon (used to make non-stick coating for pans as well as thread-seal tape for plumbing) is known as polytetrafluoroethylene or PTFE. Even Kevlar is a synthetic polymer.

Polymer labs and projects
Expanding Gummy Bears
Gummy bears are made with gelatin, a natural polymer. This lab showed diffusion, the movement of water into another substance.
I had two gummy bears that I soaked in water overnight. One was soaked in regular tap water; the other sat in distilled water. Each student was given one dry gummy bear and asked to measure it. We found that a new, dry gummy bear measured about 1 1/2 cm. We then measured the gummy bears that had been soaking. Diffusion caused the bear from the distilled water to expand to 3 1/2 cm while the bear that had been in tap water expanded to 3 cm.

Balloon Trick
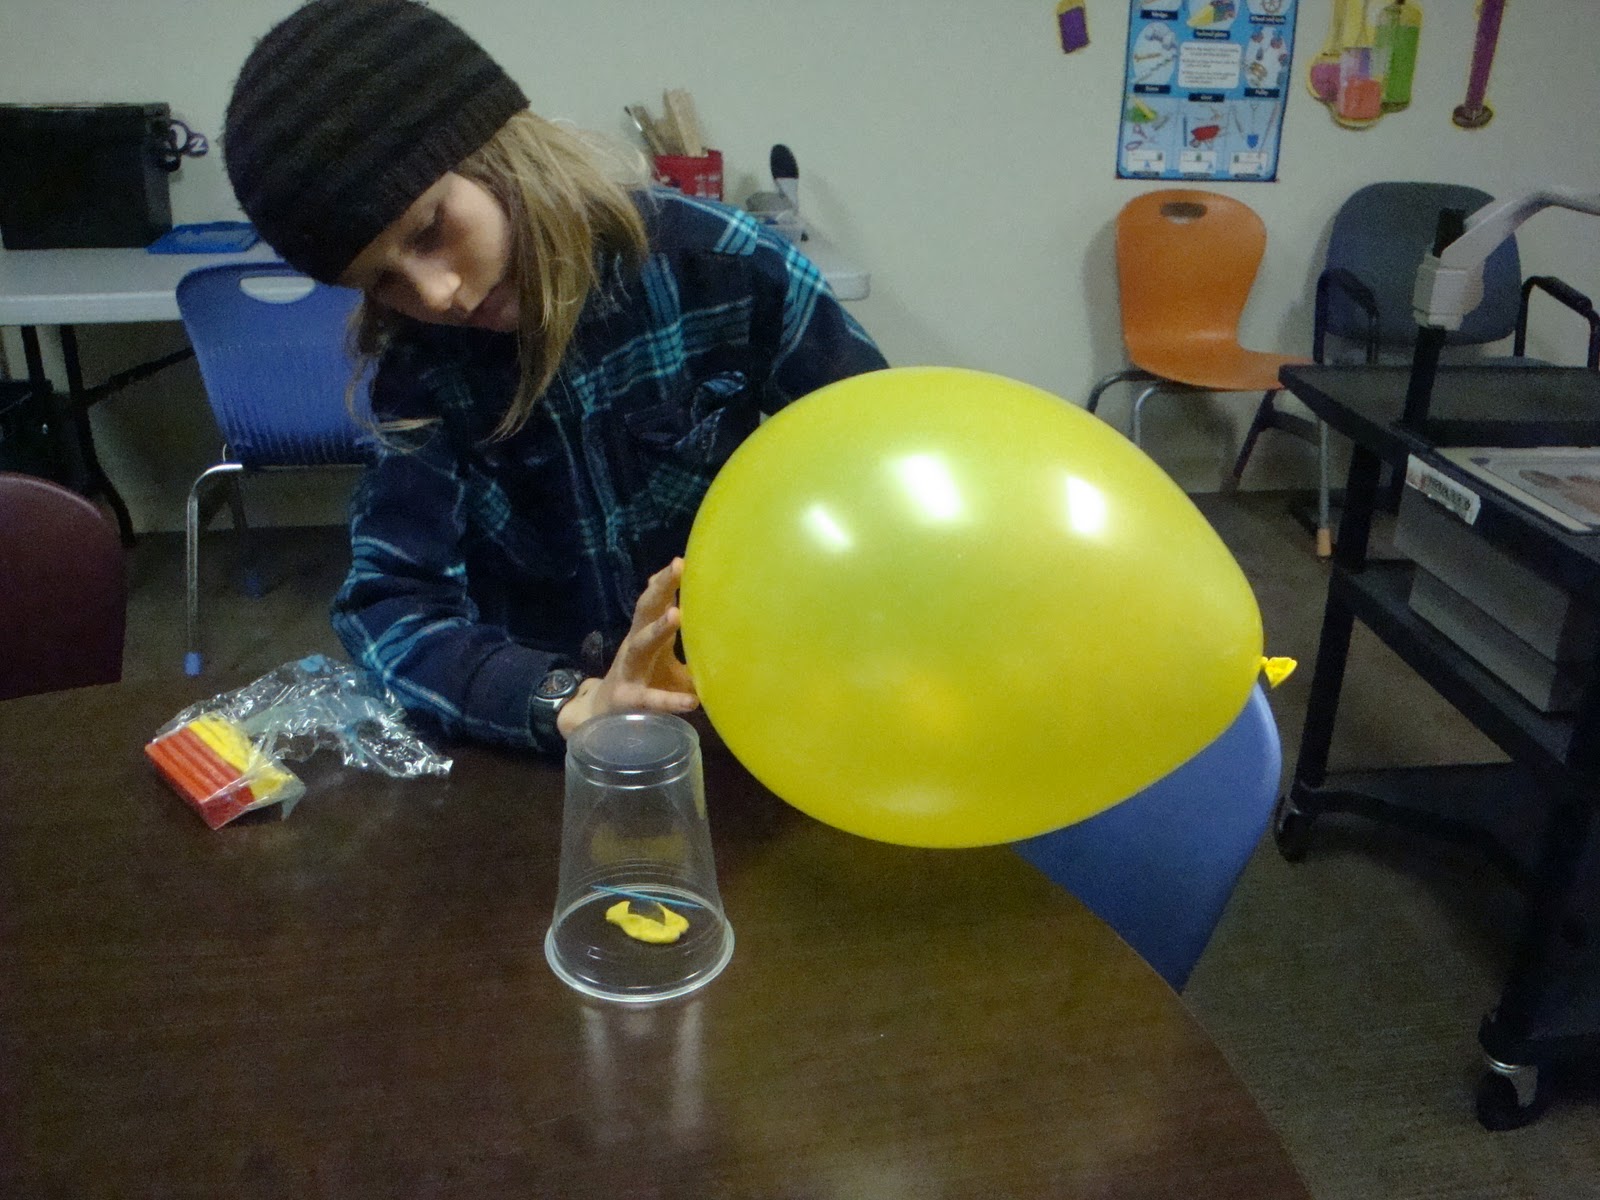
The students used a bamboo skewer to pierce a balloon without popping the balloon. They inflated the balloons then used cotton balls to dab a little veggie oil on the dark spot at the top of the balloon. This helps the skewer go through the rubber. The students then applied just a little pressure while twisting the skewer. Most were able to get the skewer into the balloon.
If you like a challenge, try getting the skewer all the way through the balloon and out of the bottom of the balloon.


Ooblek
Ooblek is simply a mixture of cornstarch (a polymer) and water (1 part water to 2 parts cornstarch). You can add a few drops of food coloring if you like.
The fun thing about ooblek is that it is a non-Newtonian fluid (a dilatant) that has properties of both solids and liquids.
Non-Newtonian fluids
Fluids are substances that can flow. They have a property called viscosity which describes the thickness of any fluid and its resistance to flowing. Sir Isaac Newton believed that the viscosity of a fluid could only be changed by changing its temperature. Those that change viscosity due to temperature changes (water, oil) are Newtonian fluids. However, you can change the viscosity of some fluids by applying a force. These are the non-Newtonian fluids. Pushing or pulling on the ooblek changes its viscosity.

Fake Snow
Our fake snow looked more like slush but it was still fun to make!
The students mixed a polymer called sodium polyacrylate with water. Sodium polyacrylate is known as the "diaper polymer" since it's used as an absorbent material in disposable diapers.


Bouncing Polymer Ball
I think we needed to make a bigger batch of this to make bouncy balls with. The stuff we ended up with was not enough to form anything with. It did make a nice slime material, though!
The students mixed 2 tbsp. of warm water with 1/2 tsp. of borax in a cup. We poured 1 tbsp. of school glue into a separate cup then mixed 1/2 tsp. of the borax mixture into the glue. The students added 1 tbsp. of cornstarch to the glue-borax mixture and stirred well.
Doubling the materials used would probably be enough to create a ball. Just mix until it becomes too stiff then pull the mixture out of the cup and mold it into a ball shape with your hands.

Here is the history of Silly Putty:
http://chemistry.about.com/od/everydaychemistry/a/sillyputty.htm

Next week:
Chemical reactions and solutions.

References:
I found lots of information about polymers on The Kids' Macrogalleria site. The Expanding Gummy Bears idea also came from this site.
There is so much more information that we didn't get to. I could spend weeks on this topic!

I found the Ooblek recipe here:
http://chemistry.about.com/od/chemistryhowtoguide/ht/oobleck.htm

The Fake Snow recipe came from this website:
http://chemistry.about.com/od/chemistryhowtoguide/ht/fakesnow.htm

You can learn more about the bouncing polymer ball project here:
http://chemistry.about.com/od/demonstrationsexperiments/ss/bounceball.htm

Remember these from last week?

Friday, March 4, 2011

March 3 - Changes and Phase Changes

We were supposed to re-try the "Pop Cork" lab from last week today but, as I was pulling in the parking lot at the school today I realized I had forgotten to bring the yeast. We'll try that one again next week. Hopefully I will remember the yeast!

We did still finish up the gas lesson from last week. I started out with a quick introduction to the gas laws: Charles' Law and Boyle's Law.
Boyle's Law. Robert Boyle was a British scientist who studied how gas pressure and volume are related. He found that as the volume of a container decreases, the pressure of the gas in the container increases. I gave the example of "pouring" a gas out of a 2-cup measuring jug into a baby food jar. The baby food jar is much smaller so, if we moved the gas from the jug to the jar, the pressure of the gas would increase. This is due to the tiny particles in the gas being pushed or compressed. They are forced to move closer together giving them less space to move around.
Boyle's law also tells us that if we were to move the gas from the baby food jar to the measuring jug, the pressure would decrease because those tiny particles have much more space to move.

Charles' Law. Jacques Charles was a French scientist who studied how the volume of a gas relates to its temperature. Charles' law states that as the temperature of a gas increases, the volume also increases. If the temperature decreases, then, the volume decreases. I used an example of a hot air balloon. As the temperature of the gas in the hot air balloon increases, the volume increases filling the balloon with air. To allow the balloon to land, the temperature and volume of the gas are both decreased.

Fading Color lab - This was one of the labs we didn't get to last week. It shows the effect of dry bleach on color.
For this lab, each student was given a baby food jar filled with water. They added two drops of food coloring to the water. The students then added one teaspoon of powdered bleach and stirred carefully. We let the jars sit and observed them periodically. The colors started to fade almost immediately; by the end of class they were much lighter!


1st photo taken immediately after adding the bleach; probably around 10:20.
Bleach contains oxygen. When the bleach and water were mixed, the bleach slowly started to give off oxygen gas. The combination of the oxygen and the dye caused the color to gradually fade.

2nd photo taken around 10:25. 
3rd photo taken around 10:35
Final photo taken after class (11:40). We really noticed a difference in the colors!
After finishing up the gas discussion and lab we moved on to today's topic: Phase changes.
I gave them a quick quiz to see what they remembered about the phases of matter. The students also discussed what they already know about how the phases can change (melting, solidifying, vaporizing, condensing). One student also knew about sublimation that we covered today. We spent some time discussing examples of each phase change.

Colder Water lab - In this experiment we saw the temperature of icy water become even colder.
We filled an empty metal can with crushed ice and then added water to cover the ice. The students added a thermometer to the can and we then waited 30 seconds before measuring the temperature. At this point, the temperature of the water was about 40 degrees F.
I then added 1 tablespoon of table salt to the icy water and stirred. We replaced the thermometer in the can and waited another 30 seconds. The students then recorded the new temperature and found it had lowered to just over 30 degrees F.
This happens because the salt requires energy to dissolve in the water. The salt gets that energy by removing heat from the water causing the temperature of the water to lower.

Frosty Can lab - This was another lab to show the effect of salt on the temperature of water.
We used the same can of salty, icy water from the Colder Water experiment. We added two more tablespoons of salt and stirred well. The students let the can sit and we watched as water condensed on the outside of the cold can. The amount of condensation increased as the can rested. Again, this is due to the salt taking heat from the water to provide energy for it to dissolve. If we left the can long enough, we would probably see a layer of frost form on the outside of the can.

Chilling Effect lab - Each student was given a thermometer and asked to blow their breath across the bulb about 15 times. They noticed the temperature of the thermometer had risen due to the heat of their breath.
We then moistened cotton balls with rubbing alcohol and rubbed the alcohol-soaked ball on the bulb of the thermometer. The students then removed the cotton ball and blew across the bulb another 15 times. We noticed that, despite the hot breath, the temperature of the thermometer was lower.
As the students blew on the thermometer, their hot breath caused the liquid in the bulb of the thermometer to expand (we spent a minute discussing what expand means). The liquid molecules move farther apart, causing the liquid to rise in the thermometer. The cool rubbing alcohol evaporated from the thermometer and takes energy away from the liquid in the bulb. As the liquid cools it contracts (again, we took some time to discuss the meaning of contract). The molecules of liquid take up less space and the liquid moves down the thermometer.

Sublime Sublimation
Sublimation is the process of a solid changing directly to a gas without going through the liquid phase. It can be seen easily with dry ice.
Dry ice is carbon dioxide in its solid form so, as it sublimates, it changes back into carbon dioxide gas. We reviewed what we already know about carbon dioxide - it's used to make drinks fizzy (carbonated beverages). Carbon dioxide is also the gas that is created in the vinegar-baking soda reaction.
Before starting these labs we went over some safety considerations for the dry ice. Carbon dioxide is heavier than oxygen so it actually removes/takes over the oxygen in the air. This is how CO2 fire extinguishers work. I told the students we'd go outside to complete most of the dry ice observations so we'd have plenty of ventilation. We also went over reasons why we shouldn't touch the dry ice with bare skin or taste it.
Observing Sublimation
1) I put a few pellets of dry ice into a styrofoam cup and then used a hair dryer to heat them up. The students were able to see the gas vapors coming off the pieces of ice. We found this worked a little better when I held the hair dryer at the side of the cup as opposed to at the top/opening of the cup.

2) We covered the cup/dry ice with some plastic wrap. We know the dry ice sublimates into a gas so we should have seen the plastic wrap puff up. It did a little but we were hoping for something more dramatic! :)

3) I lit a candle and "poured" the vapors from the cup with dry ice over the candle. Since carbon dioxide overrides the oxygen, the candle was extinguished (this again shows how the CO2 fire extinguishers work).

4) I placed a piece of dry ice on the ground and gave each student a towel and a penny. The students held the penny with the towel and then held the edge of the penny on the dry ice. This makes a great squealing sound!
We know carbon dioxide gas is released as the dry ice sublimates. When the students held the pennies on the chunk of dry ice, it caused that gas to become trapped. The gas pushed against the penny and caused the penny to vibrate/squeal.

5) We added some water to a cup with dry ice. This really showed the vapors/the dry ice sublimating.


One of the students asked what dry ice is used for. It's mostly used for refrigeration. Dry ice can be used if the power goes out so food doesn't spoil. It's also used in refrigerated trucks. Dry ice is also used in special effects and fog machines. We saw this with the water and dry ice.

We finished up class by making our own ice cream. It's very easy to make at home and uses minimal ingredients. Here's the recipe if you'd like to try this again. This makes enough for one person.
1/2 cup milk
1/2 tsp. vanilla extract
1 tbsp. sugar
4 cups ice
4 tbsp. salt
2 quart size zipper freezer bags
1 gallon size zipper freezer bags
Hand towels/gloves to keep your fingers warm

Mix the milk, vanilla, and sugar together in one of the quart size bags. Carefully squeeze out as much air as you can (to prevent the bag from bursting open) and seal it tightly. Place this inside the other quart size bag (we double-bagged to prevent salt and/or ice from mixing in with our milk mixture). Put the two small bags inside the gallon bag. Add the ice to the gallon bag and sprinkle salt on top. Squeeze out the excess air and seal the bag tightly. Now, shake the bag until the milk mixture starts to solidify. It can take anywhere between 5 to 10 minutes so patience is key.
*You can also add a little chocolate syrup to the milk and sugar mixture to make chocolate ice cream.


Why salt? That relates to the Colder Water lab above. The salt removes energy from the ice as it melts the ice. This causes the temperature of the liquid milk to lower and become more solid.

We ran out of time and didn't get a chance to discuss freezing, boiling, and melting points. Here it is so you can go over it at home if you'd like.
Phase changes occur due to a change in energy which changes due to a change in temperature. We know that for a liquid to change to a gas, we increase the temperature. The boiling point of water is 212 degrees F. Remember, though, that liquids don't need to boil to become a gas/vapor. Changing a solid to a liquid also requires an increase in temperature/energy. The temperature required to change a solid to a liquid is the melting point. The melting point of water is just over 32 degrees F. As we learned earlier, the freezing point of water is 32 degrees F. Salt and sugar have higher melting points than water which explains why it's easier to dissolve salt or sugar in hot liquids than cool liquids. For a gas to condense or change into a liquid, it needs to lose some of its energy or cool down. The dew point of water (the temperature at which the water vapor in the air changes to liquid) is just over 32 degrees F.

To look forward to next week:
Polymers! We'll discuss natural and man-made polymers. The students will make their own slime and will learn how to insert a toothpick into a balloon without popping it.

References:
The Colder Water, Frosty Can, Chilling Effect, and Fading Color labs are all from Chemistry for Every Kid.
VanCleave, J. (1989). Chemistry for Every Kid: 101 Easy Experiments That Really Work. San Francisco: Jossey-Bass.


I found the ice cream recipe on this website:
http://teachnet.com/lessonplans/science/plastic-bag-ice-cream-recipe/

The dry ice/sublimation ideas came from this website:
http://tlc.ousd.k12.ca.us/~acody/Dry_Ice.html

The students told me about the squealing pennies. Here's some more information on that topic:
http://www.seriouslyfunnyscience.com/node/73

Additional information on matter and states of matter:
Bose-Einstein Condensates. 
http://www.chem4kids.com/files/matter_becondensate.html
Well, it really is true that we learn something new every day! I had never heard of this type of matter. This state of matter was created in 1995 and is based on work (from the 1920s) by Satyendra Bose and Albert Einstein.
The students know plasma is very hot; gases have to be really excited (their temperature has to be increased considerably) for them to become a plasma. The Bose-Einstein Condensates, however, are very cold. The particles in this state of matter barely move at all.

More basics on matter and the states of matter.
http://www.chem4kids.com/files/matter_intro.html


http://www.chem4kids.com/files/matter_states.html

Chem4Kids is a really great website and includes all areas of science (and some math!) It's written in kid-friendly language, includes colorful graphics and charts, and makes a great complement to the wonderful (home school-friendly) activities and experiments in the Janice VanCleave books.

Tuesday, March 1, 2011

February 24th - Gases

We continued last week's study of the phases of matter by spending more time discussing gases.

To start out, I asked the students what they remembered about gases from last week's class. Do they have a definite volume? What about a definite shape? Are the particles packed close together? Do gases take up space? We discussed the reasoning for the answers to each question.

Dry Paper lab - This lab proved that even though we can't see gases, they do take up space. Each student was given a plastic cup and a piece of notebook paper. They wadded up the paper into a ball so it fit into the bottom of the cup (if you try this at home, make sure the paper has a snug fit and cannot fall out). The students then turned the cups upside down and submerged them in a bucket of water. They were very careful to push the cups straight down into the bucket and to lift them straight out without tilting the cups.
The paper was dry when the students removed it from the cups. Air fills up the cup on top of the paper and prevents water from entering the cup and getting the paper wet.

We spent a little time talking about oxidation. I asked the students what would happen if I left some newspaper on the back window ledge of my car. They knew it would turn yellow. This is actually the opposite of most reactions involving oxygen. Oxygen can be used as a bleaching agent so you would think adding oxygen would turn something white, not yellow. Newspaper is a little different. The materials used to make newspaper are actually yellow. Chemicals are then added that remove oxygen from the newspaper and turn it white. Sunlight heats up the air and acts as a catalyst for the reaction between oxygen in the air and those chemicals in the paper. This reaction then causes the paper to turn back to its original yellow.
We also did a quick demonstration of oxidation of fruit. I cut an apple in half and set one half off to the side. We squeezed a little lemon juice on the other half. When fruits such as apples, bananas, and pears are peeled, cut, or bruised, their cells are broken. Chemicals released by the broken cells react with oxygen and result in the brown color. Vitamin C or the citric acid in lemon reacts with the oxygen before it can react with the chemicals in the fruit, preventing the discoloration.


I asked the students to name any gases they could think of. We also talked about the gases that make up earth’s atmosphere (oxygen, nitrogen, argon, carbon dioxide, and water vapor). We looked at the periodic table of the elements and I showed the students how to identify the gases.

Last week, we learned that all matter is made up of smaller particles. These can then be split up into three groups: positively-charged protons, neutral neutrons, and negatively-charged electrons. I showed the students how to use the periodic table to find out how many of each particle an atom of different elements has.
Protons. To find the number of protons, just look for the element’s atomic number. This is usually located above the symbol. Oxygen, for example is 8, argon (Ar) is 18, and helium (He) is 2.
Neutrons. To find the number of neutrons, subtract the atomic number from the element’s atomic weight. The atomic weight is the number (usually a decimal) underneath the element’s name. Oxygen’s atomic weight is 15.9994. The students knew we could round that up to 16. This means oxygen has 8 neutrons. Argon has an atomic weight of 39.948 so it has 22 neutrons. Helium’s atomic weight is 4 giving it 2 neutrons.
Electrons. The number of electrons is related to the group that each element is found in. There are 8 main groups on the periodic table (look at the Roman numerals with A after them at the top of each column). Elements in group I such as hydrogen, sodium (Na), and potassium (K) all have one outer electron. Oxygen is in group VI so it has six outer electrons.

We moved on to talk about some special groups on the periodic table. Two of the gases, fluorine (F) and chlorine (Cl), are part of the halogens. These are elements in group VII and they like to join with elements from group I. We talked about how sodium from group I likes to join up with chlorine from group VII to form table salt, NaCl. Another special group are the noble gases. These are group VIII. Compounds like to have eight outer electrons so the noble gases do not like to join up with other elements. They already have 8 electrons in their outer shell since they are in group 8. I spent a little time showing them some other combinations of elements and how they like to join up to have 8 outer electrons. I drew dot diagrams for salt and water on the board to show the 8 total electrons.

Escaping Bubbles lab – The students were given a baby food jar filled halfway with soda. We placed the jars on the table and watched the bubbles rise to the top of the jar. We discussed how soda (and other fizzy drinks) are made with carbon dioxide gas. That’s where the word carbonated, as in carbonated water, comes from. Large amounts of carbon dioxide are dissolved in water. This high volume of gas is compressed into a relatively small space (a soda or Perrier bottle) and is immediately sealed so the gas is under high pressure. When the lid is removed, the gas starts to escape right away (that “pssssh” sound is the pressure being released). The bubbles the students observed were bubbles of CO2 gas that was escaping the open baby food jar.

Foamy Soda lab – This lab showed effervescence, a fancy word for replacing a gas with another substance.
The students kept the baby food jars and soda and added a teaspoon of salt to the liquid. They watched as foam erupted from the jars. Since salt and carbon dioxide are both examples of matter, we know they both take up space and that they can’t be in the same space at the same time. One has to move! The salt pushes the lighter gas out of the way causing lots of carbon dioxide bubbles to move to the top of the jar at the same time. The moving gas creates the great foam that the students observed.

Escape lab – This was another lab to show the removal of carbon dioxide from soda. For this, we placed a balloon around the open mouth of a bottle of soda. The students gently shook the bottle and then set it on the table. We watched as the balloon inflated.
We know the particles in gases are spaced far apart and have plenty of room to move around. Shaking the bottle of soda excited the gases causing their particles to move around even more. The open bottle, as we saw in the last two labs, allowed the excited gas to escape and the pressure from the gas caused the balloon to inflate.


How Long? lab - For this, we set up a pipe using a piece of clear plastic tubing, some clay, a jar, and a soda bottle. We then poured some water into the soda bottle and added a broken up Alka-Seltzer tablet. We placed a little of the tube into the soda bottle and sealed it up with the clay. Water was added to the jar and the free end of the tube was placed into the water in the jar. The students then watched as bubbles traveled through the tube into the water in the jar. OK, so we couldn't really see the bubbles travel along the tube but they did see the water in the jar bubbling. Very cool one to try at home.
The combination of Alka-Seltzer and water creates carbon dioxide which is the gas the students were able to see bubbling in the jar.


We tried one more lab but didn’t have much success with it (most likely due to teacher error!) We’ll try this one again next week since I’m sure it’s really cool when done correctly. J
For this, we’re going to attempt to shoot a cork from a soda bottle. We will add some dry yeast and sugar to warm water inside a soda bottle. We’ll then place a cork in the mouth of the bottle and let the yeast do its thing. Hopefully, the carbon dioxide that is produced by the yeast will build up enough pressure to pop the cork from the bottle.

 Our un-popped corks! I hope we have better luck next time.
To look forward to next week:
*The Pop Cork lab detailed above.
*Fading Color lab – we ran out of time for this. It will show the oxygen gas in bleach.
*We will discuss phase changes and make ice cream!


References:
The labs "Dry Paper," "Escaping Bubbles," "Foamy Soda," "Pop Cork," and "How Long?" are all from Chemistry for Every Kid.
VanCleave, J. (1989). Chemistry for Every Kid: 101 Easy Experiments That Really Work. San Francisco: Jossey-Bass.
The lab "Escape" is from 200 Gooey, Slippery, Slimy, Weird, and Fun Experiments. 
VanCleave, J. (1993). 200 Gooey, Slippery, Slimy, Weird, and Fun Experiments. New York: John Wiley and Sons, Inc.


Some photos from Mrs. Kole's origami class.

Tuesday, February 22, 2011

February 17th - Matter

This week's topic was matter. We discussed the four states of matter: solid, liquid, gas, and plasma. The students looked at characteristics of each and discussed how matter can change.

To start the class, I asked the students to describe a votive candle. We then lit the candle and the students discussed changes they observed and any new states of matter they noticed. I also took this opportunity to provide a brief introduction to chemical and physical changes. The students understood that the candle, when lit, was undergoing both physical and chemical changes.

We completed two labs at the beginning of class. These both demonstrated that atoms have positive and negative parts.
Paper hop lab - For this, each student was given a balloon as well as several small circles from a hole punch. The students rubbed the inflated balloons on their shirts and then held the balloon close to (but not touching) the paper circles. We watched the circles "jump" up and stick to the balloon.
The students knew that all matter is made up of atoms. I built on this by telling them about the neutral, positive, and negative components: neutrons, protons, and electrons. When the students rubbed the balloons on their shirts, the balloons picked up electrons from the shirts. This gave the balloons an excess of negative charge. The positive part of the paper circles were attracted to those extra negatively-charged electrons on the balloon. This attractive force is so great that it overcame gravity allowing the paper circles to jump up and attach themselves to the balloon.


Do Not Touch lab - This was another lab that included charging a balloon and using it to move another object. This is a fun and easy one to try again at home.
Each student was given a nickel, a balloon, a toothpick, and a plastic cup. The students had to stand up the nickel on its edge and then balance the toothpick on the top edge of the coin. We had a little trouble getting the nickels to stand up so the students used a little modeling clay to help. Good thinking! We managed to do this with round toothpicks but I'm sure it's much easier if you have flat ones.
Once the toothpicks and nickels were balanced, the students carefully placed a cup over the coin. They then rubbed the inflated balloons on their shirts and held the balloon near the cup. As they moved the balloon, the toothpick also moved.
Again, rubbing the balloon against a shirt (or your hair) will cause it to gain extra electrons. The negative charge of these electrons attracts the positive charge of the toothpick causing the toothpick to move with the balloon.


We moved on to discuss some other basic characteristics of matter. We talked about how all matter takes up space and has mass but it can exist in different states of forms. These states depend on temperature.

Solids - Every solid has a definite shape and a definite volume. The tiny particles inside an object are in constant motion. In solids, these particles are very close together so they don't move much; they mostly just vibrate next to each other. Since they can't move over or around each other, they are able to hold their shape.

Before moving on to liquids, I asked the students if every metal is a solid. They knew there was one, mercury, that is a liquid at room temperature. We discussed some uses of mercury (old thermometers, amalgam fillings, fluorescent light bulbs). Mercury will not become a solid until it reaches -40 degrees celsius. Brrrr!

Liquids - Just like solids, liquids have a definite volume. If you poured 1 cup of water into a different container, you would still have 1 cup (provided, of course, you didn't spill any). However, liquids do not have a definite shape. Liquids will take on the shape of their container.
Liquids are able to move a little more than solids but the particles in liquids are still relatively close together. They do have enough kinetic energy to move around and over each other, allowing them to take on the shape of whatever container you pour them into.

Unseen Movement lab - This lab allowed the students to observe molecular motion.
For this lab we had a jar full of water and some red food colouring. I added three drops of food colouring to the water and the students watched as they flowed down through the water and started to spread out. We left the red water in the jar in the classroom so we'll see what has happened during the week. The water should be completely red since the particles of food colouring will evenly spread through the water. This is called diffusion.

Where Did It Go? - For this lab, we used another jar of water along with some rubbing alcohol and food colouring. I poured one cup of water into the measuring jar and then added six drops of blue food colouring. I then measured one cup of rubbing alcohol and added that to the water. The students then each checked the level of the liquid.
The liquid level was below the two cup mark. There are small pockets of space between the water molecules. The rubbing alcohol filled in these pockets so we had a combined volume of less than two cups.

Gases - We have a whole class dedicated to gases next week so we only discussed them briefly during this class session.
We started out this section with a lab:
An Empty Sack? - I filled an empty plastic bread sack with air and then held the top to close it. The students tried squeezing the bag but were unable to completely deflate it. This showed that air, while we can't see it, does take up space.

Gases do not have a definite volume. Gases do not have a definite shape. They can contract or expand to fill the space available to them. Gases can also be squeezed (or compressed) into a smaller space. I showed the students a picture of a CNG logo and asked if they had ever seen that logo on a vehicle such as a city bus. I also asked them if they knew what CNG stands for. This stands for Compressed Natural Gas (they got the Natural Gas part). Compressed means squeezed so the natural gas that is powering those buses has been squeezed to fit into a smaller container. Nitrogen, one of the gases we breathe, can be compressed to form liquid nitrogen, which is very cold. I talked a little about liquid nitrogen and how it immediately turns into its gaseous form at room temperature. If you pour liquid nitrogen it looks like you are just pouring out a gas; all you see is the vapour.
The particles of a gas have enough kinetic energy to separate completely from one another. They are free to move in all directions.

Plasma - I started this section by asking the students which of the states of matter they thought was the most common. While we encounter solids, liquids, and gases throughout the day, the most common is actually the one we don't really talk about. Plasma makes up stars and nebulae. 99% of the mass of the solar system is contained in the sun making plasma the most common form of matter in the universe. We looked at some Google images of nebulae.
Plasma can also be seen in fluorescent lights. When you turn on a fluorescent light bulb, the electricity causes particles of mercury inside the bulb to form plasma.

Rising Ball lab - I filled a glass jar with rice and buried a small ball in the rice. After adding the lid to the jar, the students were each given the jar and instructed to shake it from side to side (not up and down). As they shook the jar, the ball rose to the surface of the rice.
As we saw earlier in the Where Did It Go? lab, there are small spaces between the particles of any sample of matter. When the students shook the jar, the grains of rice moved closer together (settled) causing the ball to be pushed up to the surface. This shows, then, that two pieces of matter cannot occupy the same space at the same time.


Not at the Same Time lab - This lab further demonstrated that two pieces of matter cannot occupy the same space at the same time.
For this, each student was given a plastic cup, 6 marbles, some water, and some masking tape. The students placed the masking tape on the cup to mark the top of the water level. They then added the marbles to the cup and noticed that the water level rose. The marbles push the water out of the way causing the water level to rise. As we know, though, the volume of the water did not change. The change in the water level is equal to the volume of the marbles.

Next week: We will continue our study of matter by learning more about gases. Pop a cork from a soda bottle using yeast and make foaming soda.

Reference

The labs from this class session are all from Chemistry for Every Kid.
VanCleave, J. (1989). Chemistry for Every Kid: 101 Easy Experiments That Really Work. San Francisco: Jossey-Bass.

Wednesday, February 16, 2011

Spring semester class starts tomorrow!

The Spring semester session of the Physical Science class starts tomorrow, February 17th. Here's what students have to look forward to:

February 17th - Matter (solids, liquids, gases, plasma). When can a metal be a liquid? When can a gas be a liquid? Is an empty sack really an empty sack? Make paper hop off the table and a ball rise in a jar of rice.

February 24th - Gases. Learn why the noble gases don't like to "hang out" with the other elements (snobs...) Make foamy soda!

March 3rd - Phase changes. Learn about a solid form of a gas. Make (and eat!) your own ice cream.

March 10th - Polymers. Explore non-Newtonian fluids and make it "snow" in Vista!

March 17th - Chemical reactions and solutions. Learn what makes red velvet cake red (hint: it's not food coloring). We'll go way beyond the old vinegar-baking soda reaction to make colors erupt instead. We'll also watch hydrogen peroxide decompose.

March 24th - Acids and bases. Write invisible messages. Make dirty old pennies look like new.

March 31st - Light. Learn about chromatography and prisms. Make patterns with Skittles.

April 7th - Sound. We'll explore vibrations and waves. Make instruments.

April 14th - Break for STAR Testing

April 21st - Spring Break

April 28th - Electricity. Bend water with static electricity! Make a solar cooker and a battery from a piece of fruit.

May 5th - More on electricity. Explore and build circuits.

May 12th - Magnets. Mine for iron during breakfast. Make an electromagnet.

May 19th - Balance and flight. Make a ball float and paper flop!

Monday, January 10, 2011

1/6/2011 - Simple and Compound Machines

In an effort to boost learning center enrollment for next semester, I held a free preview day this week. Four student visitors stopped by to check out the class. I hope they'll join us for the whole semester in the Spring!

We continued our study of simple machines this week and also used this knowledge to create a compound machine.
Since our last class was before winter break, I started out with a quick review of the six simple machines (wheel and axle, lever, screw, pulley, inclined plane, and wedge). We also reviewed the definition of a machine.

Pulley: A pulley is a wheel with a grooved edge over which a rope can be pulled. There are actually three types of pulleys: Fixed pulleys, movable pulleys, and pulley systems.

Fixed pulleys: Fixed pulleys change the direction of force.

Movable pulleys: Movable pulleys change the amount of force.

Fixed and Movable Pulleys lab: This lab required us to set up a fixed pulley and then a movable pulley and see which one required less force to lift a load (40 coins). The students started out lifting the load with no pulley and discussing their results. We then created the fixed pulley and each student had a turn using the machine to lift the load. To finish, we set up a movable pulley and tried the experiment one more time. We found that the force needed to lift the load with no pulley was the same as that needed to lift the load with a fixed pulley. The movable pulley required a little less force.

Pulley systems: Pulley systems are a combination of both a fixed pulley and a movable pulley. Therefore, they change both the direction and amount of force.

Pulley Systems lab: We used the same load (40 coins) for this lab and started out measuring how much force was required to lift the load with no pulley. We then set up a pulley system with a fixed pulley and a movable pulley. The students then measured the force needed to lift the load using the pulley system.
As predicted, this machine used less force to lift the load than using no pulley. The pulley system required less force than the fixed pulley but about the same amount of force as the movable pulley. However, a pulley system can be more useful since this machine allows a user to pull down rather than lifting up (as was required with the movable pulley).

Compound machines: A compound machine is created when two or more simple machines work together.

Compound Machines lab: For this lab students used household objects to create a windlass, a machine that helps pick up heavy items. The simple machines used to create the windlass are the screw and the wheel and axle. Lab directions can be found here:
http://www.ehow.com/how_4687302_make-compound-machine.html#ixzz13nDbtMRw
*I had a really hard time finding wire hangers but was able to break the hook part from plastic hangers. I just wrapped a little electrical tape around the sharp end of the hook where it had been broken from the hanger.

The Fixed Pulley, Movable Pulley, and Pulley Systems labs were all from a Lakeshore Learning Science Activity Tub on Simple Machines.

The Compound Machines lab was found on this website:
http://www.ehow.com/how_4687302_make-compound-machine.html#ixzz13nDbtMRw

This was our final class for the Fall 2010 semester. Our next Vista Learning Center class session will begin on or around Wednesday, February 23rd. We will hold classes on Wednesdays and Thursdays.
Look for information about class offerings and times to be sent via e-mail.
Hope to see you then!

Friday, December 17, 2010

December 16th - Simple Machines

I was having so much fun teaching this topic that I forgot I had my camera and didn't take a single photo! :) We will be continuing this topic after the Winter Break so I'll try to remember to take some photos during that class session.

We started class with a quick introduction to the six simple machines: lever, inclined plane, wedge, screw, wheel-and-axle, and pulley. We talked about how all machines make life/work easier and that some need a power source to run while others, such as the simple machines, do not.

We completed the lab "Levers" to show just how one of the simple machines can help make things easier.
For this lab, the students were given a stack of four hardcover textbooks and were asked to try to lift the stack of books with their pinky finger. As you might imagine, they had a tough time with this! They were then given two pencils and instructed how to make a basic lever by placing one pencil on top of the other (in a + shape). The students then placed the pencils so the point of the top one was under the stack of books. They pressed down on the eraser end of the top pencil and saw how this lever was now able to lift the stack.

Levers - Rigid bars that pivot on a fulcrum (fixed point). In that first lab, the bottom pencil served as the fulcrum.

Levers are classified as either first-class, second-class, or third-class. Each class has a different fulcrum and load position. We spent some time discussing each lever and completed a short experiment for each one.

First-Class Levers - In a first-class lever, the fulcrum is located between the effort force and the load. To lift a load, a downward force must be applied to the opposite end of the lever. A seesaw is a good example of a first-class lever.
For this lab, the students were given a small cardboard crate, some marbles, a lever, a fulcrum, and a spring scale. We started out by placing the fulcrum far away from the load position (almost at the opposite end of the lever). The students then placed the crate of marbles (our load) on the end of the lever that was away from the fulcrum and the spring scale on the end near the fulcrum. The students then pulled down on the spring scale until the load began to move. They noted how much force (in ounces) was required to lift the load.
The students then repeated this lab after moving the fulcrum so it was located under the center of the lever. They noticed it took less effort to lift the load when the lever was in this position.

Second-Class Levers - These differ from First-Class Levers in the sense that the load is placed between the fulcrum and effort force. If you think of a wheelbarrow, the person pushing the machine (the effort force) is at one end, the load is in the middle, and the fulcrum is located near the front wheel.
For this lab, we taped the fulcrum to the edge of a desk then set up the lever by placing the fulcrum at one end of the lever bar. Our lever was hanging off the end of the table. We tied a string around the end that was hanging off and hung the marbles (in a drawstring bag) on the lever about 2 inches from the fulcrum. The spring scale was hooked onto the piece of string and the students pulled up on the spring, noting how much force was needed (in ounces) to lift the lever. We tried this again with the load (bag of marbles) 5 inches from the fulcrum and 8 inches from the fulcrum.

Third-Class Levers - In a third-class lever, the effort force is located between the load and the fulcrum. A fishing rod, with the effort force (reel) between the fulcrum (handle) and load (hook) is an example of a third-class lever. Tweezers are another example.
To demonstrate how third-class levers operate, the students taped the fulcrum to the underside of a desk (at the edge) with the point facing down. One student held the lever bar so one end was at the fulcrum. We tied a piece of string to the lever about 2 inches from the fulcrum and added the drawstring bag of marbles to the opposite end of the lever. The spring scale was then attached to the string. The students pulled on the scale and recorded the force needed to lift the load. We then repeated this with the scale placed at a distance of 5 inches from the fulcrum and again at 8 inches from the fulcrum.

Inclined Plane - An inclined plane is a smooth, flat surface tilted at an angle like a ramp. Instead of lifting a load straight up, an inclined plane allows a load to be moved over a longer distance to reach the same height. This requires less effort.

Inclined Plane lab - We used the lever bar from the previous labs to create our inclined plane or ramp for this experiment. The students used books to create an incline, starting with one book. The cardboard crate was filled with 40 coins to create a load. The students placed the load at the bottom of the ramp and used a piece of string to attach the spring scale to the load. They then pulled on the scale and measured the effort needed to pull the load to the top of the ramp. We repeated this lab using 2 and 3 books to create steeper inclines.

Wedge - A wedge is two inclined planes back-to-back. Wedges work by changing the direction and amount of force. Some examples of wedges include an ax, nails, a knife, and teeth!

Wedge lab - For this lab, the students used different materials to attempt to lift a crate of marbles. The students used the eraser end of a pencil, the point of a pencil, a crayon, and the pointy end of a pair of scissors to attempt to lift the crate of marbles. The students discussed which ones made the job easier. The pencil point and the scissors were found to be the best wedges.

Screw - A screw is an inclined plane wrapped around a cone or column.

"Lifter" lab - Each student was given a large wood screw. They placed two fingernails on the first ridge at the tip of the screw and then turned the head of the screw to observe its movement.
Screws are used to connect things but they can also be used to lift items. Screw jacks, for example, can lift houses or cars.

We had just enough time at the end of class to go back and complete some more labs on the simple machines we covered today.
"Ramp" lab - This lab showed how a winding mountain road is an inclined plane.
The students were each given a pencil, a ruler, a piece of paper, and some tape. They cut a 5-inch square from the piece of paper then drew a diagonal line across the square. The students cut across the line and colored the longest edge of one of the paper triangles. They then taped the triangle to the pencil so the shortest leg of their triangle was taped vertically to the pencil. The students then wound the paper onto the pencil and saw the colored line make a shape like a winding road or screw around the pencil.
As we discussed, inclined planes make work easier by gradually traveling upward over a long distance. A winding mountain road is a longer way up a mountain but it is easier than traveling straight up a side of a mountain.

"Weakling" lab - This lab demonstrated a second-class lever.
Each student was given a toothpick. They placed the toothpick across the back of their middle finger at the tip of their fingers and under the first and third fingers. The students then tried to break the toothpick by pressing down with the first and third fingers. We tried this again by moving the toothpick down to the first knuckle of the middle finger.
In this lab, the fingers were acting as a second-class lever similar to a nut-cracker. The fulcrum in this lever is where the fingers join the hand so more force is needed to break the toothpick when it if placed farther from the fulcrum.

The labs "Levers," "Ramp," "Lifter," and "Weakling" are from Physics for Every Kid.
VanCleave, J. (1991). Physics for Every Kid: 101 Easy Experiments in Motion, Heat, Light, Machines, and Sound. San Francisco: Jossey-Bass.

The labs "First-Class Lever," "Second-Class Lever," "Inclined Plane," and "Wedge" are from a Lakeshore Learning Science Activity Tub on Simple Machines.

**We will take two weeks off for Winter Break so there will be no class on December 23rd or 30th. Our last class for the Fall semester will be held on Thursday, January 6th. During that class we will finish up simple machines and see how simple machines can be combined to create compound machines.
Learning Center classes for the Spring 2011 semester will most likely begin during the week of February 21st. Check your e-mail in the new year for information about class offerings.