Friday, May 13, 2011

May 12th - Magnets

Class started with the students discussing what they already know about magnets. We also went over the idea that magnets can attract or repel each other, just like electrical charges and the subatomic particles. In magnets, opposite poles (North and South) attract while like poles repel.

Close Encounters Lab – Each student was given two balloons, a marker, and some string. The students blew up each balloon then tied a piece of string to the end of each one. They labeled one balloon “A” and the other “B.” The free ends of each string was then taped in an open door frame.
The students charged Balloon A first and then observed the balloons. They then charged both balloons and observed.
We got really good results with the two charged balloons and were able to see them repel each other. We really didn’t see Balloon A attract Balloon B in the first part of the experiment but the students did understand this was supposed to happen.

Fun Fact – Magnets got their name from the region of Magnesia, which is now part of modern-day Greece. The first naturally occurring magnetic rocks, or lodestones, were found in that area almost 3,000 years ago. A lodestone is composed of an iron-based material called magnetite.

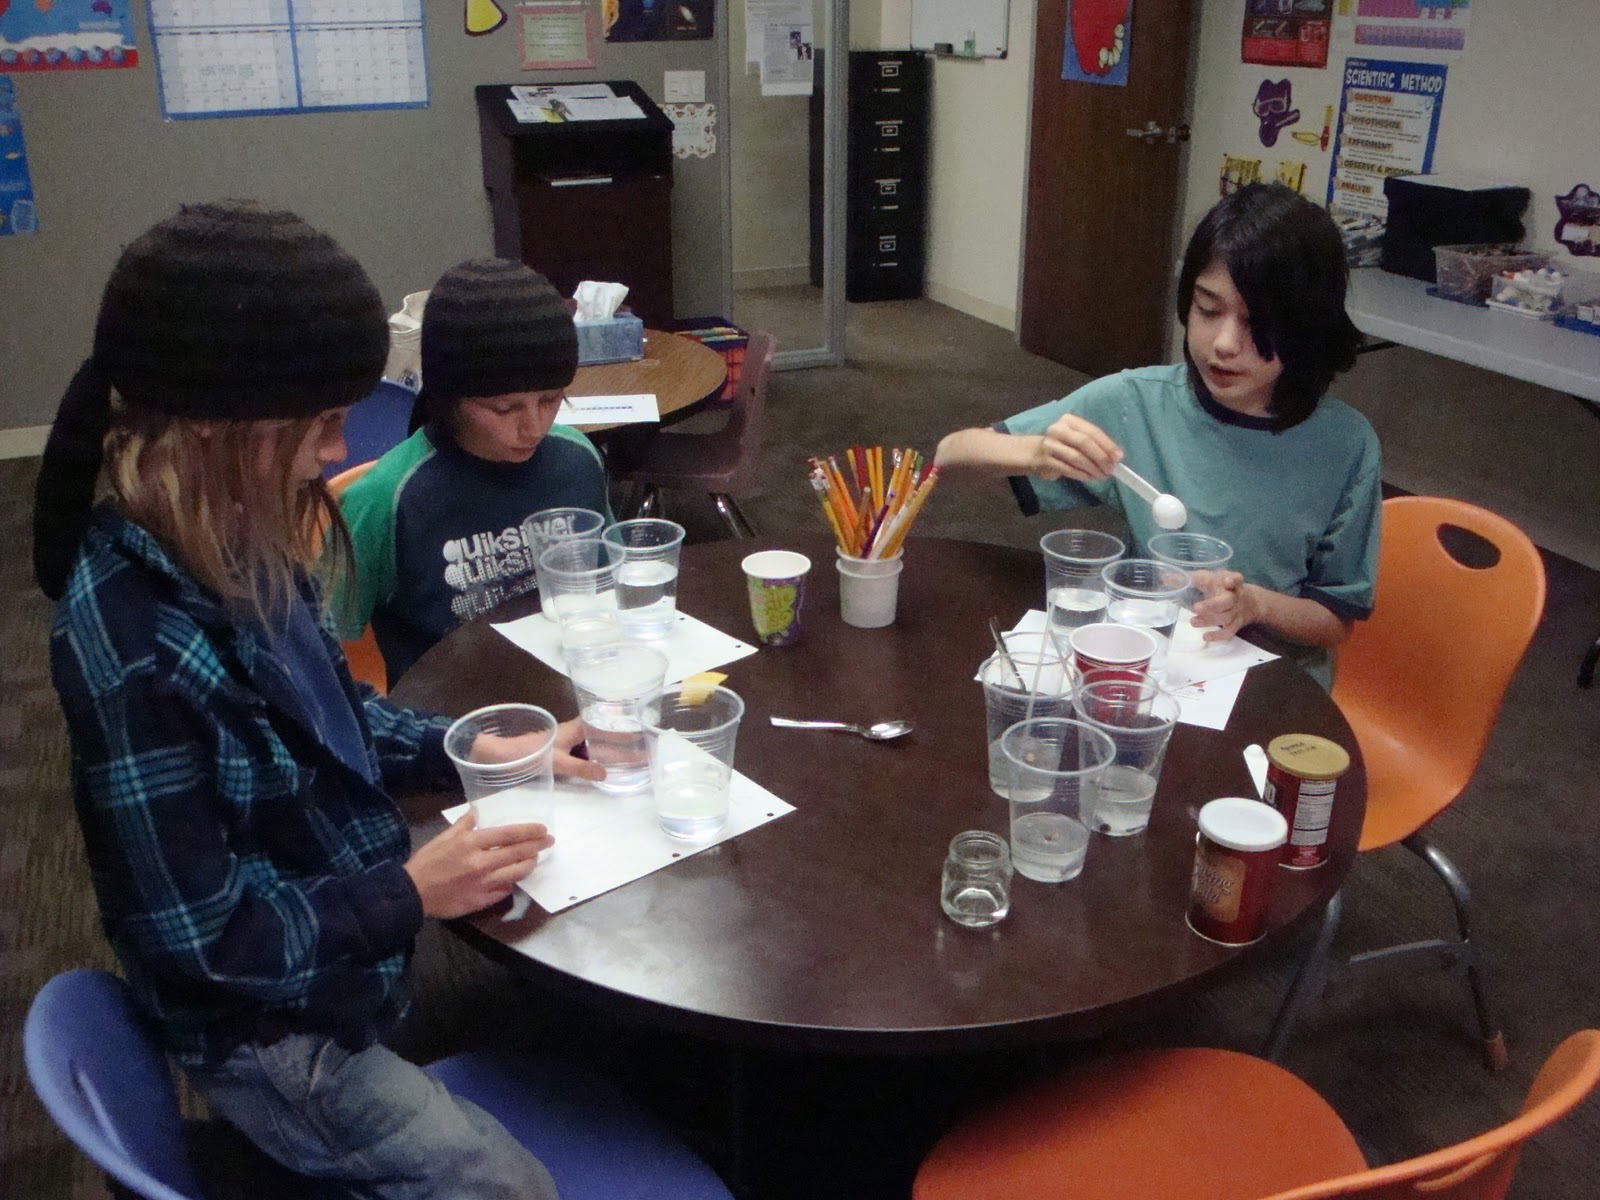
Iron from Cereal Lab – Prior to starting this lab we spent a few minutes discussing iron in foods. I asked the students if they knew reasons why humans need to consume iron and we spoke a little about the functions of iron and sources of iron.
Iron primarily functions as an oxygen carrier in the blood. It also assists with the immune system, cognitive development, temperature regulation, and energy metabolism.
Each student had a bowl of Corn Flakes that we added water to. We started out using a fork to make the cereal mushy but decided a blender would do a better job. Once the cereal was soggy, the students stirred a magnet through the cereal and then wiped it on a paper towel. We were able to find some small amounts of iron (it looks like black fuzz).


A few weeks ago, we went over Coulomb’s Law. This law states that the attraction or repulsion of two electrical forces becomes greater as the two charged objects get closer together. This same effect can be demonstrated with magnets. We used two bar magnets and found that as they were moved closer together, the attraction or repulsion became stronger.

Magnetic Domains – Magnetic materials contain magnetic domains. These are clusters of atoms that behave like tiny magnets. Objects are not magnetic when the magnetic domains are randomly arranged. However, if they do all line up, the object takes on magnetic properties. This explains how a nail or paper clip can become magnetized.

Permanent and Temporary Magnets – Some metals are permanent magnets due to the fact that their magnetic domains are permanently lined up. Fridge magnets and the magnets we had in class (horseshoe magnets, bar magnets, ring magnets) are all examples of permanent magnets.
Temporary magnets are metals that can be made into a magnet by lining up the magnetic domains. These include iron and nickel. Rubbing a paper clip or nail on a magnet will cause the magnetic domains to line up, creating a temporary magnet. An electromagnet is another example of a temporary magnet.

Suspended Airplane Lab – The students each created a small “wing” by folding up a piece of crepe paper. They inserted a pin through the center of the paper wing and then tied a piece of sewing thread to the head of the pin.
Each student placed a bar magnet on the edge of the table and then held the wing out in front of the magnet. The students observed as the wing was attracted to the magnet.
The magnetic field surrounding the magnet exerted the attracting force on the pin/wing. The pin and magnet both have magnetic properties. The two objects pulled on each other with enough force to overcome gravity, allowing the wing to remain suspended in the air.


Compasses and Earth’s Magnetic Field – The students all know Earth has a North Pole and South Pole. We are able to use compasses because the Earth acts like a giant bar magnet. The needle of the compass aligns with Earth’s magnetic field. The needle will point in a direction that lies along the magnetic field line at that point.
An interesting fact about Earth’s poles: Earth’s North Pole is actually at the south end of its magnetic field while its South Pole is at the north end of its magnetic field.

Swinger Lab – Each student was given a compass, a piece of sewing thread, a small paper clip, a ruler, some tape, a heavy book, and a magnet. They taped one end of the thread to the paper clip and then taped the other end to the ruler. The students then placed the ruler inside the book and placed the book on the edge of the table. They magnetized the paper clip by holding it on the bar magnet for several seconds. The students removed the paper clip from the magnet then let the clip swing freely. The compasses were placed on the table next to the book and the students observed the movement of the compass needle and where it stopped. The compasses showed that the paper clip pointed North-South once it stopped swinging.
The north poles of all magnets are attracted to the Earth’s north magnetic pole. Magnets are all north-seeking poles. As long as the paper clip is magnetized (its magnetic domains are lined up in a north-south direction), one end will point toward Earth’s magnetic north pole.

Electromagnet Lab – We attempted to make electromagnets using both insulated wire and bare copper wire. We didn’t have any luck with the insulated wire and only one student was able to get the electromagnet with the copper wire to work.
For this, the students wrapped the wire around a nail. They attached the free ends of the wire to a D-cell battery in a battery holder (one end to each battery terminal). They then tried to use the electromagnet to attract paper clips.
The Direct Current running through the battery should have caused the magnetic domains within the nail to line up causing it to become magnetic.
This is an easy one to try at home. Experiment with different types of wire or different nails. You can use electrical tape to attach the wires to the battery terminals.

Uses of electromagnets – Electromagnets are used in motors, CDs, computer hard drives, and alarms. I showed the class a transparency with a diagram of an alarm bell and asked them to locate the electromagnet. We also discussed how the electromagnet causes the alarm’s hammer to vibrate and create the alarm’s sound.

We finished up class by using magnets to move iron filings. The iron filings were attracted to the magnet that was moved over or under the plate the filings were on. The students were able to make patterns and also observed the filings “jump” up to stick onto the magnets. The filings are pulled toward the magnet when they enter the magnet’s magnetic field.

Next week:
Next week will be our last class session for the year. We'll study balance and flight. The students will review center of gravity (a topic we covered back at the beginning of the school year). We'll also learn about lift, thrust, and drag and how these forces, along with gravity, affect planes. 

References:
The labs "Close Encounters," "Swinger," and "Suspended Airplane" are all from Physics for Every Kid.
VanCleave, J. (1991). Physics for Every Kid: 101 Easy Experiments in Motion, Heat, Light, Machines, and Sound. San Francisco: Jossey-Bass.

I found the "Iron from Breakfast Cereal" lab on this website: http://chemistry.about.com/cs/howtos/ht/ironfromcereal.htm

The idea to make electromagnets came from a Lakeshore Learning Materials kit on Electricity.

Tuesday, May 10, 2011

May 5th - Electricity II (Circuits)

We started our second electricity class by setting up solar cookers. We also spent a bit of time talking about how solar power works and the benefits of solar power.

Here's a link with directions to make a solar cooker. It's really easy and they really do work! :) Be sure to check it every 15-20 minutes so you can keep it in the sun. I think we would have had better results if we had checked ours.
We used the solar cooker to make s'mores but we finished toasting the marshmallows a bit using the flame from a candle.

As predicted, the smaller box made a more efficient solar cooker.
Gooey marshmallow fresh from the solar cooker!
Finishing the "toasting" process.
Yum!
Voltage - A volt is the measure of the difference in electrical charge across two points. I used a battery as an easy example. The students knew about the two battery terminals (positive and negative). In a battery, the voltage is the measure of the difference of charge across these two terminals. We looked at several types of batteries (D-cell, AA, AAA, 9 volt, etc.) and found the voltage for each one.

Current - We went back over Alternating Current (powers plug-in devices) and Direct Current (found in batteries). If you switch on a battery-powered flashlight, the terminals of the battery are connected through the light bulb. Electrons move through the bulb from the negative terminal to the positive terminal. When these charges are accelerated, a current is produced. Current, then, is the rate at which charges move through a conductor. Current is measured in amperes or amps.

Potato Circuit lab - We set this up at the beginning of class since it takes an hour to work. This lab required half of a potato, 2 pennies, a D-cell battery, 2 paper clips, masking tape, and a push pin. The students folded a piece of aluminum foil to create a long thin strip. They then cut this in half to make two thin strips. These strips became "wires." They cleaned the pennies with a little steel wool and then wrapped one end of each piece of foil around each of the pennies and used a paper clip to keep the foil in place. They stuck the edge of each penny into their potato half so the foil wire was on the outside of the potato. The students then used masking tape to attach the free end of the foil to the battery (one piece to each terminal). The push pin was inserted in the potato to help the students remember which penny was attached to the positive terminal of the battery. Once this is set up, leave the whole thing for one hour.

We removed the pennies at the end of class and found that the pennies that were attached to the positive terminal of the battery had left a green mark on the potato.
The copper in the pennies that were connected to the positive terminal took on a positive charge. These positive penny particles combine with negative particles in the potato to create a green copper compound.
The penny that was connected to the positive terminal left the green mark at the bottom of this potato.
Circuit - A fancy definition for a circuit is "a set of electrical components connected such that they provide one or more complete paths for the movement of charges." So, a circuit is a complete path that connects charges and allows them to be conducted.

An example of a basic circuit would be a battery, some wire, and a light bulb. If you connect them to create a complete path, the light bulb will illuminate.
When an electric current can travel through an entire circuit, the circuit is a closed circuit. If there are places where the electricity cannot pass or cross, the circuit is an open circuit.

Simple Circuits lab - Each student was given three pieces of wire, a lightbulb and bulb holder, a D-cell battery, and a battery holder. They then looked at the circuits pictured below and predicted which ones would allow the bulb to light up. The students then set up each of the five circuits and observed what happened.


Series Circuits - These have a single path for the current to flow. If one wire or connection in a series circuit is blocked or cut, the entire circuit is opened and it stops carrying the electrical current.
An example of a series circuit are the older holiday lights. If one bulb burned out or became loose or disconnected, the entire string of lights stopped working.

Parallel Circuits - These have multiple paths for current to flow. The electric current can follow two or more paths to form a circuit with a power source.
Newer strings of lights are an example of parallel circuits. Each bulb has its own complete/closed circuit connecting it to a power source. The lights continue to work even if one bulb burns out.

Parallel and Series Circuits lab - For this lab, the students predicted how series and parallel circuits would behave if one of the two light bulbs in each circuit was disconnected.
The students were given two bulbs and bulb holders, four pieces of wire, a D-cell battery, and a battery holder. They set up the series and parallel circuits as shown below and then unscrewed one bulb from each. We then observed what happened and discussed the results.


Switches - A light switch is probably the thing most people think of when they think of a switch. Switches can be found in all sorts of electrical appliances and machines to make them turn on or off. A switch is a gap in a circuit that can be opened or closed. When the switch is closed, the circuit is closed so this is the switch's "on" position. The "off" position opens the switch and the circuit.

Switching On and Off lab - The students set up a circuit using a bulb and bulb holder, a D-cell battery and a battery holder, a switch, and some wires. They then used the switch to open and close the circuit and observed what happened to the light bulb.
They also tried setting up other circuits with the switch by adding bulbs and batteries.


The students finished up class by checking on the solar cookers and enjoying s'mores.

To look forward to on May 12th:
We'll be studying magnets! We will experiment with different types of magnets, try extracting iron from cereal, and we'll make an electromagnet.

References
The lab "Potato Circuit" is from Physics for Every Kid.
VanCleave, J. (1991). Physics for Every Kid: 101 Easy Experiments in Motion, Heat, Light, Machines, and Sound. San Francisco: Jossey-Bass.

The labs "Simple Circuits," "Parallel and Series Circuits," and "Switching On and Off" are from a Lakeshore Learning Materials kit on Electricity.

I found the Solar Cooker instructions on the PBS Kids website.

More information on solar energy and how solar power works:
Energy Kids (from the US Energy Information Administration)

Solar Energy!

More information on circuits:
NASA Science Files - Circuits

Friday, April 29, 2011

April 28th - Electricity I (Static electricity, batteries)

We will spend two weeks on electricity. This week, we covered static electricity and batteries; next week we'll discuss circuits.

We spent a few minutes at the beginning of class reviewing the charges of the three subatomic particles. Protons have a positive charge, electrons are negative, and neutrons are neutral. I gave each student two balloons. They inflated them and then rubbed the balloons on their hair. The students held the balloons and tried to push them together. They noticed the balloons pushed each other away.
This happened because both balloons had the same charge. In science, opposites charges attract and like charges repel. Similarly, when the students rubbed the balloon on their hair, their hair "jumped" up to stick to the balloon. The hair and balloon had opposite charges causing them to be attracted to each other.

Coulomb's Law - Coulomb's Law has to do with the attraction or repulsion of forces. Part of the Law states that like charges repel and opposite charges attract. Coulomb's Law can also be used to show that a difference in the amount of charge between two objects affects the strength of the repulsion or attraction. French scientist Charles Augustin de Coulomb showed that forces of attraction or repulsion become stronger as objects move closer together. The opposite is also true; the attraction or repulsion becomes weaker as objects are moved farther apart. So, as the charge increases, so does the electrical force created between the two objects.
As a side note, Coulomb was probably not the first to discover this law of physics. Henry Cavendish, an English scientist, came up with similar ideas but he did not publish his work and the credit was given to Coulomb. Cavendish's work was not discovered until decades after he died.
Here's an experiment (similar to the one above) that can help explain Coulomb's Law.
http://www.science4mykid.com/project_detail.asp?pid=51&offset=
You can also demonstrate this with magnets. In fact, we will revisit this in a couple of weeks when we look at magnetism.

Fun fact - The SI (International System) unit for measuring electrical charge is the coulomb.

Conductors and Insulators - I showed the class a couple of power chords and explained that the plastic coating is an insulator. I also showed them a piece of wire that I'd stripped the insulation from so they could see what's inside.
We discussed that metals are generally good conductors of electricity (the students knew copper and gold are excellent conductors). Copper is often used to make electrical wires since it's relatively inexpensive.
Conductors allow electrical charges to move freely since they can carry an electrical current. Insulators, on the other hand, do not transfer electrical currents easily. While the charges inside a power chord can move through the conducting metal wires, they cannot escape through the insulating plastic. This helps appliances run efficiently and protects people from electric shock. Other insulators include rubber, glass, and cardboard.

Conductors and Insulators lab - The students were each given a D-cell battery, a battery holder, a light bulb and bulb holder (wires were already connected), and some test materials (foil, eraser, quarter, pencil, plastic-coated paper clip, uncoated paper clip, wooden ruler, plastic ruler).
The students connected the light bulb to the battery and then tested each object to discover if it was a conductor or not. As predicted, the only conductors were the quarter and uncoated paper clip.
You can try this at home with other test materials. Use electrical tape in place of the battery holder. You can also use old Christmas tree lights for the light bulb. Just cut a section with a bulb and then strip away part of the insulation from the wire.

Transfer of Electrons - We reviewed what we'd already discussed about the three subatomic particles and their charges. I drew an atom on the board with the protons on neutrons on the inside and the electrons on the outside of the atom. I then drew diagrams to show how atoms can lose or gain electrons and that this can change charges.

Charging by Friction - Think of sliding along a cloth car seat. As you do this, some electrons are transferred between your clothes and the car seat. One material gains electrons while the other loses electrons. Charging by friction also explains why you get zapped if you rub your shoes along a carpet and then touch a metal doorknob on a dry day.

Static electricity is an example of charging by friction. Static means stationary so static electricity is a build-up of negative or positive stationary charges.

Charging by Contact - This occurs when you charge an object by touching it with a charged object. To demonstrate this, I drew a door knob on the board with a rubber rod touching the door knob. The rubber rod was negatively charged and the doorknob had a neutral charge (equal numbers of protons and electrons). When the negatively charged rubber rod touched the door knob, electrons were transferred from the rod to the door knob giving the knob a negative charge.

Charging by Induction/Induced Charges - The students had already learned that like charges repel and opposite charges attract and that electrons can move between atoms and objects to change charges. I used the same door knob diagram to demonstrate this concept. In this one, we also had a negatively-charged rubber rod. When the rubber rod became close to the door knob (without touching), it caused the protons and electrons within the door knob to move. Rather than transferring electrons from the rod, though, the charge of the door knob remained neutral. What did happen was the positively-charged protons moved to the handle of the door knob (they were attracted by the negatively-charged rubber rod) and the negatively-charged electrons in the door knob moved away from the area closer to the rubber rob (they were repelled by it).
This can be a bit tricky but some of the labs we completed below provided hands-on experiences with induced charges.

Static Electricity lab - I found a great science kit at the MPCS library back at the beginning of the school year and it included a plastic tube with tiny styrofoam balls. Perfect for demonstrating static electricity!
The students were given some test materials - a piece of felt, a piece of wool, a cotton ball, and a piece of foil. They also tested the tube with the carpet and their hands. They rubbed the tube with each of the test materials and observed what happened to the styrofoam balls inside the tube. As the students rubbed the tube with the various materials, they noticed the balls were sometimes attracted to one another and sometimes repelled. This is due to a transfer of electrons causing some atoms to gain electrons and some to lose electrons. The foil created the least amount of static electricity.
This showed charging by friction.

Streamers lab - For this lab, I cut pieces of tissue paper to give them long thin streamers. Each student was given a piece of the cut tissue paper and a comb. They combed through their hair a few times then held the comb close to (without touching) the tissue paper. The paper strips moved toward the comb.
The students charged the comb with static electricity. This was charging by friction since electrons were rubbed from their hair onto the comb. This also showed an induced charge since the negatively-charged comb attracted the positively-charged atoms in the paper.

Electroscope lab - An electroscope is an instrument used to measure the charge of static electricity. The electroscope has two thin pieces of metal (leaves) suspended from a metal hook. When a negatively-charged object is placed close to the hook, some electrons will move to the hook. They then travel down the hook to the leaves. If a positively-charged object is placed near the hook, some electrons will transfer from the hook to the positively-charged object. As the leaves are charged (in either case), they will repel each other. A stronger charge will cause the leaves to repel each other farther apart.
We built our own electroscopes using plastic cups, paper clips, and foil. I uncurled some paper clips leaving one curved end. Each student was also given two thin strips of foil (leaves) and another piece of foil. They poked a hole in the bottom of the cup with the paper clip and pushed the straight end of the paper clip through the cup so the curved part remained inside the cup. They then attached the two foil leaves to the curved end of the clip. The students put the cup upside down on the table and scrunched the remaining foil into a ball around the straight end of the paperclip.
They then charged a balloon by rubbing it on a piece of wool and then placed the ball near the foil ball. They watched how the leaves reacted to the charge.
This lab shows an induced charge.

Tinkle lab - The students were given a small piece of aluminum foil that they ripped into small pieces. They then charged a comb by combing it through their hair several times. The students placed the comb near the small foil pieces and observed. The foil pieces jumped to stick to the comb.
As we know, this is due to the negatively-charged particles in the comb attracting the positively-charged particles in the foil. The attraction here was so strong that the foil overcame gravity to jump up to the comb.

Bending Water with Static Electricity - This quick lab gave one last demonstration of an induced charge.
The students charged a comb and then held the comb close to a thin stream of running water. They watched as the water bent toward the comb. This is due to the positively-charged particles in the water being attracted to the negatively-charged particles in the comb.

Current - Current in electricity is the movement of electrons from one object to another. We saw a lot of that in the labs we completed! Current is measured in units called amperes.
There are two main types of current - Direct Current (DC) which always flows in one direction and Alternating Current (AC) which is a flow back and forth. AC can also change directions. Batteries are an example of direct current. The electricity in our homes and outlets is alternating current.

Batteries - All batteries have a positive and a negative terminal. If these two terminals are connected, the electrons in the material connecting the terminals will flow to create a current. Electrons move from areas with higher negative charge to those with a lower negative charge. So, electrons like to move from the negative terminal of a battery to the positive terminal. These electrons are the charge. Charge moves from negative to positive. Current (DC), however, moves from positive to negative.

Hot lab - We created a circuit had a little preview of next week's class during this lab.
Each student was given an AA battery and a piece of aluminum foil. They folded the foil to make a thin strip and then held one end of the foil strip against each battery terminal or pole.
**If you try this at home, do not hold the foil against the battery for more than 10 or 15 seconds!**
The foil "wire" created a path or circuit for the electrons to move through. As we learned earlier, the electrons in a DC current (like a battery) flow from the negative terminal to the positive terminal. This movement (current) of electrons caused the foil wire to become hot.
This is similar to what happens in an incandescent light bulb. Electrons flow into the bulb and this flow or movement causes the filament to heat up. The wire filament becomes so hot that it gives of light. Scientists say the filament becomes incandescent, hence, incandescent bulbs are the ones with the thin wire filament inside.

Fruit Battery - We attempted to create a fruit battery using a lemon but we didn't have much luck with it. The directions I used called for a copper nail or copper wire. I didn't have a nail but did find some copper wire so we tried that. Unfortunately the wire didn't quite cut it but one of the students suggested we try this with a penny. Good idea so I'll try to squeeze this in again next week with the penny! We're actually going to make a potato circuit next week that uses a penny so this will relate quite nicely if we have time to try again.
Here's a link to the directions so you can try this at home if you like:
Fruit Battery
Try this with other fruits. If you're able to find some, use some pH paper to test the acidity levels of the fruits and see if a fruit with a lower pH (higher acidity) produces a brighter light than one with a higher pH/lower acidity.

Next Week:
We'll continue our study of electricity by looking at circuits. We'll create simple, parallel, and series circuits and will also learn how switches work. We're also going to attempt to use a solar cooker to make S'mores. Hopefully the sun will be shining and there won't be the usual San Diego "May Gray" but I have a back-up plan so the students can enjoy S'mores even if our solar cooker doesn't quite work as planned. :)

References:
The labs "Hot," "Streamers," and "Tinkle" are all from Physics for Every Kid.
VanCleave, J. (1991). Physics for Every Kid: 101 Easy Experiments in Motion, Heat, Light, Machines, and Sound. San Francisco: Jossey-Bass.
"Bend Water with Static Electricity" is from this website: http://chemistry.about.com/od/chemistryexperiments/ht/bendwater.htm
"Fruit Battery" was found here:
http://chemistry.about.com/od/chemistryhowtoguide/a/fruitbattery.htm
"Static Electricity," "Conductors and Insulators," and "Electroscope" were all from a Lakeshore Learning Materials kit on Electricity.

Friday, April 8, 2011

April 7 - Sound

Sound travels in waves just like light. For this reason, we spent the first part of our class reviewing last week's lesson on waves. We went back over transverse and longitudinal waves as well as the parts and measurements of waves (crest, trough, wavelength, amplitude).
Sounds travel along longitudinal waves. It can travel through gases, liquids, and solids.

Demonstrating Sound Waves lab - For this, the students filled Zip-Lock bags with air and sealed them tightly. They held the bag over one ear while covering their other ear with their hand. A second student tapped on the bag with the eraser end of a pencil. 
We then put water in the bags and tried this again. As a final test, the students held a wooden block against their ear while a friend tapped on the block with the pencil eraser.
This demonstrated how sounds can travel through gases, liquids, and solids but that sound waves differ when traveling through each.


Good Vibrations lab - Each student blew up a balloon and held the balloon next to one of their ears. A partner then pressed their lips against the balloon and spoke. We rotated around the room so everyone had a chance to play the roles of listener and speaker. This allowed the speaker to "feel" their voice as the balloon vibrated against their lips. The listeners were able to hear and feel the vibrations that created the sound waves.


Instruments
Different instruments made sounds in different ways. We spent some time looking at wind and string instruments and discussing how they make sounds.
Wind instruments such as a flute or trumpet use vibrating air to make sounds. A flutist blows across the hole at the top of a flute. Their breath then creates waves inside the flute's tube. 
Clarinets, saxophones, and oboes use reeds (thin pieces of wood) to create vibrations. 
Guitars are string instruments. When a guitarist plucks a guitar string, they create rarefactions and compressions as the string vibrates back and forth. Shortening a guitar string makes it sound higher (it gives it a higher pitch). 

Human Voices
When a person speaks or sings, air is forced forced from their lungs up through their voice box or larynx. The voice box is made up of two folds (vocal chords) that vibrate as the air from the lungs rushes past them. When the chords move together they form compressions; as they move apart they create rarefactions. 

Pitch
Pitch describes the highness or lowness of a sound or musical note. 
Frequency describes how often something happens. In waves, frequency refers to the number of waves that pass a certain point each second.
Higher pitch sounds have higher frequencies while lower pitch sounds have lower frequencies. High pitch sound waves are more compressed; low pitch sound waves are more rarefied.
The students watched this animation of pitch and frequency:
(you may need to go to "What is Sound?" from the menu on the left and then find page 4 [you can click on the "4" at the top of the page.])

Straw Flute lab - We couldn't get this one to work very well despite trying straws of two different sizes. 
Each student was given a drinking straw and pair of scissors. They made a "reed" by cutting a small section (about 1/2-in.) off each side of the top of the straw. The students then placed the straw in their mouths. They blew while pushing on the reed and tried to make a sound. We tried shortening the length of the straw which should have produced a higher pitch.
The point of this was to see that shortening the length of the medium that the wave is traveling in will increase the wave's pitch. Earlier we mentioned that a shorter guitar string will produce a higher sounding note. This is the same idea. The longer the column or tube of vibrating air, the lower the pitch. The shorter the column, the higher the pitch.

Twang lab - This one did allow us to hear differences in pitch caused by changing the length of the medium.
Each student was given a wooden ruler. They placed the rulers on the table with about 10 inches of the ruler hanging off the end of the table. They held down on the ruler with one hand and then pushed and released the free end of the ruler with their other hand. The students listened to the sound produced then tried this again while sliding the ruler further onto the table. 
The shorter the ruler became, the higher the pitch it created.
You can see an animation of this lab ("Vibrations") on the University of Salford/Physics.org "Sounds Amazing" site. Click on "What is Sound?" on the left-hand side menu then click on page 2 from the menu at the top of the page. Make sure to hold down on the mouse button to hear the twangs (and make sure the volume on your computer is not up too high!)


String Music lab - This one was another lab that demonstrated that changing lengths of the medium changes the pitch of the sound.
We cut a length of string a little longer than the length of the table and then tied each end to a bucket. We then placed several rocks in each of the two buckets to act as weights. I placed a pencil under the string close to each bucket and then invited the students to pluck the string. They listened to the pitch of the sound created and then moved the pencils closer to each other. They tried plucking again and listening to the sounds. We noticed that as the pencils moved closer (shortening the length of the medium), the pitch became higher.


Loudness
The amplitude of a wave is the distance between the trough and the crest. It's the vertical length of the wave or how tall the wave is. I like to think of "altitude" (how high above sea level you are) to remember this because that word sounds a bit like "amplitude."
Loudness is related to amplitude. A wave with a higher amplitude will produce a louder sound. 
Check out page 5 from "What is Sound?" on the University of Salford site: "Loudness and Decibels"

Loudness is measured in decibels (dB). A higher decibel means something is louder. We went over the decibels of some common sounds:
*Rustling leaves - 10 dB
*Whisper - 20 dB
*Loud conversation - 60-70 dB
*Loud music - 90-100 dB
*Rock concert - 115-120 dB
*Jet engine - 120-170 dB
*Space shuttle engine - 200 dB
We also spent a bit of time talking about loud noises and the potential for hearing loss. 

The Speed of Sound
Sound waves actually change speeds as they travel through different media or different forms of matter. The students are all aware of how the particles in solids, liquids, and gases are related so I built on that knowledge to show them how the speed of sound can change.
Solids - The particles in solids are very tightly packed. These particles vibrate next to each other but they don't move around. Because the particles are so close together, sounds travel quickly through solids. This is the type of matter that sounds travel fastest through.
Liquids - The particles in a liquid are a little more loose than those in a solid. They get to move around and over each other. This means sounds travel a little slower through liquids since sound waves have a bit further to go between particles.
Gases - Gases are the least tightly packed. The particles in gases are able to buzz all over and move a lot. Sounds travel slowest through gases. 

When scientists talk about the "speed of sound" they are referring to the speed of sound through air (gas) at room temperature (~76 degrees F). This is about 340 meters/second (about twice as fast as a jet plane). Here's how the speed of sound differs in different materials:
*Fresh water - 1,490 m/s.
*Plastic - 1,800 m/s.
*Steel - 5,200 m/s.
*Glass - 4,540 m/s.

The students seemed pretty interested in this so we spent a bit of time talking about the speed of sound, sonic booms, and Concorde/supersonic aircraft. We even looked up the speed of light (299,792,458 m/s) and compared that to the speed of sound. :)  

Sounds and Temperature
When I was little,  my parents would tell my siblings and I to "keep it down" when we were outside at night since "your voices carry at night." Here's the physics behind that.
It's all related to temperature. During the day, sound waves are able to spread out due to a higher air temperature. At night, the cool air sinks closer to the ground while the warmer air rises. This cooler air causes the sound waves to spread out and bend (this is known as diffraction). The sound waves, then, travel further at night or in cooler temperatures.
If you go to the University of Salford site and click on Lesson 3: Wave Behaviour then on page 6 at the top you'll get the "Refraction" animation. This shows how the train sounds differently at night and during the day.

Diffraction also allows you to hear sounds around corners.
Page 7 of Wave Behaviour from the U. of Salford site shows this.

Just like light waves, sound waves can also be reflected. This is what happens in an echo when sound waves bounce off a mountain or the walls of a cave. 
Echolocation and sonar also use reflected sound waves.
We played around on Page 3 of Wave Behaviour (slides 1 and 2) to view animations of echoes and echolocation.

The Doppler Effect
To finish up class we spent a little time talking about the Doppler Effect. The Doppler Effect relates to pitch and frequency of sound waves. We know higher frequency equals higher pitch.
I asked the class if they've ever listened to a police, fire, or ambulance siren (pay attention to this next time you hear one). As the vehicle with the siren moves toward you, the pitch increases. As it goes by and moves away, the pitch decreases. You would expect, given what you know about frequency and pitch, that the frequency of the waves is changing as the car moves. The frequency actually isn't changing. This apparent change is frequency is known as the Doppler Effect.
Christian Doppler was an Austrian scientist. In 1845 he conducted an experiment with a train and a group of musicians. He put the band on a flatbed train car and instructed them to play while the train moved. Doppler stood on the ground near the tracks and listened. As the train approached, he noticed the band seemed to be playing at a higher pitch than they were as they moved past and away from him. Doppler then tried standing on the train car while the musicians played on the ground next to the tracks. He noticed the same thing. 
Scientists believe this change in pitch occurs not because of a change in frequency, but because of the motion of the source of the sound and the motion of the observer/listener. 
Think about passing a ball to a friend. If you and your friend stand still and you throw one ball to your friend every second, your friend will receive one ball every second. The frequency is 1 ball per second.
However, if you move toward your friend while throwing the ball, your friend will receive more than one ball per second. The frequency of the balls being caught increases because the wavelength (the distance between the crests of two waves or, in this case, between yourself and your friend) decreases. This is similar to the experiments we conducted earlier - "Twang" and "String Music." In those, a shorter length created a higher pitch. 

We had one more lab that we didn't get to. Here's a link with the details so you can try it at home.

Reminder:
No classes the next two weeks due to STAR Testing (April 12-14) and Spring Break (April 18-22).
We will begin a two-week study of electricity when we come back to class on April 28.

References:
The animations we used are all from the University of Salford (that's where my dad went to university) in Manchester, England. Those web pages were designed for high school students getting ready to take the physics portions of their university entry exams - A levels and GCSE. 
There's tons of great information and the little clips really make it easy to understand.

The labs "String Music," "Twang," and "Straw Flute" are all from Physics for Every Kid.
VanCleave, J. (1991). Physics for Every Kid: 101 Easy Experiments in Motion, Heat, Light, Machines, and Sound. San Francisco: Jossey-Bass.

The lab "Demonstrating Sound Waves" was found on this website (lots of others to try at home):

The lab "Good Vibrations" was found here: 

Monday, April 4, 2011

March 31st - Light

We studied light in our last class and will learn about sound this week (April 7th) so I wanted to give the students a little background on waves before moving into the other concepts.

Wave - A disturbance that transfers energy from one place to another.

Ocean waves are caused by the wind. The wind is the disturbance and it causes energy in the water to be transferred from one place to another in the form of an ocean wave.
If there is a boat on the ocean water, the wave will cause anything floating on the water to be disturbed so the energy carried by the wave lifts the boat as it passes.

Most waves require something to travel through: a medium. Any form of matter can be a medium. Waves that require a medium to travel are known as mechanical waves.
Electromagnetic waves, such as light from the sun, can travel through empty space. They do not require a medium to travel through.

Waves are created when a source of energy causes a medium to vibrate. The vibrating up and down or back and forth is the source of the wave. A boat's propellers disturb the calm surface of the water. They transfer energy to the water and cause its particles (the medium) to vibrate. This creates a wave. The movement of a boat through water also creates a transfer of energy and a wave.

Types of waves
There are three types of waves: Transverse, longitudinal, and combination.
Transverse waves - If you make a wave with a piece of rope (as we did in class), the wave moves from one end of the rope to the other while the rope itself moves up and down. In transverse waves, the waves move at right angles to the direction of the medium. The highest parts of these waves are called crests and the lowest parts are troughs. The distance between the crests of two waves is the wavelength. The distance between the trough and the crest is the amplitude.

Longitudinal waves - If you stretch out a Slinky, you can produce a longitudinal wave. These waves move the particles of the medium parallel to the direction the waves are traveling. They either both move back and forth or up and down. In the spring, the coils that are close together are called compressions while those that are far apart are rarefactions.

Combination waves - These waves have characteristics of both longitudinal and transverse waves. They occur as surface waves between two media (such as air and water). The water, and anything on it, moves up and down like a transverse wave but it also moves back and forth like a longitudinal wave.

Light
Light travels from one place to another in waves. Another name for light is electromagnetic radiation. Scientists created the electromagnetic spectrum to show the wavelengths of different types of waves as well as those of the colors of visible light.

See Through Lab - We took a break at this point to complete a lab that showed the differences between transparent, translucent, and opaque materials. The students looked through a clear plastic Zip-Loc bag, a piece of wax paper, and a piece of poster board. They discussed how things looked through each.

Transparent, translucent, opaque
Light normally travels in a straight line. When light strikes an object it can be reflected, absorbed, or transmitted. Most objects reflect or absorb light. An object that reflects or absorbs all the light that hits it is opaque. Opaque objects are things that you can't see through like the poster board.

Transparent objects transmit light. When light strikes something transparent it passes right through. The transparent object from our demonstration was the Zip-Loc bag.

Translucent objects allow some light to pass through them. They scatter light as it goes through so you can usually tell that something is behind a translucent object but you can't see the details. Wax paper is translucent.

Mirrors
Mirrors reflect light. Light passes through the glass and hits the coating on the back of the mirror. It is then reflected, allowing you to see an image. There are three types of mirrors: Plane mirrors, concave mirrors, and convex mirrors.
Plane mirrors are flat mirrors and are the ones the students probably use most. Plane mirrors produce images that are right side up and are the same size as the object being reflected.
Concave mirrors have a surface that curves inward like a bowl. These mirrors reflect rays of light that meet at a focal point. Concave mirrors can produce an image like that produced in a plane mirror. They can also produce images that are upside down and/or larger or smaller than the object being reflected. Since these mirrors can be used to produce magnified images, they are used as make-up or shaving mirrors.
Convex mirrors have surfaces that curve outward. The rays reflected by these mirrors start at a focal point and spread out. Passenger-side rearview mirrors on cars are an example of convex mirrors. They spread out rays of light allowing for a larger reflection area but, because you can see more, images appear smaller and further away. This is the reason for that "Objects in mirror are closer than they appear" message on rearview mirrors.

Refraction and prisms
When light enters a new medium at an angle, the change in speed that occurs causes the rays to bend or change direction. This is refraction.
Refraction of light can cause us to see something that is not really there. This explains rainbows and mirages (see below).
Prisms allow us to see refraction of light. When white light hits the angles on a prism, it refracts and separates into its component colors (all those colors of the electromagnetic spectrum). Longer wavelengths mean the light waves will be bent less by the prism so colors like orange and red will be bent or refracted less than blue or purple.

Prism Lab - We went outside with a prism and saw it refract the white light from the sun into the colors of the spectrum.

Water Prism Lab - We didn't have much luck with this one but that may have been because we didn't cut big enough slits in the poster board. Try this again at home and experiment with different sized slits.
You will need a poster board circle cut to fit over the lens of a flashlight. Cut a very thin slit across the circle, stopping about 1 cm from the edges. Tape the circle to the front of the flashlight. Place a glass of water on the edge of a flat chair and have a partner hold a piece of white paper near the floor at the edge of the chair. Darken the room and hold the flashlight at an angle to the surface of the water. Try changing the angle of the flashlight and moving the paper until you see the spectrum of colors.
The water acts as a prism to refract or bend the light from the flashlight.

Rainbows
Raindrops can act as tiny prisms. When light from the sun hits raindrops (or water from a garden sprinkler or hose), the light is bent by the water.

Mirages
Air higher in the atmosphere is cooler than that near the road. Light travels faster when it reaches the warmer air so the rays bend as they travel downward. This refracted light appears to come up from the ground making the rays look like they were reflected off a smooth surface such as water.

Color
Colors depend on how objects reflect and absorb light. Each object absorbs some wavelengths of light and reflects others. Our eyes see objects as the color of the light they reflect. So, a red object appears red because the red wavelengths of light are reflected by that object. All other wavelengths are absorbed. Blue objects reflect the blue wavelengths. Green things reflect green wavelengths.
Black and white are a bit different. Black objects appear black because they absorb all wavelengths of light. White objects, on the other hand, reflect all the wavelengths.

Blender Lab - This lab showed how light waves blend to produce white light.
Each student was given a 10-cm. diameter poster board circle. The students divided their circles into six equal sections then used markers (red, orange, yellow, green, blue, and violet) to color each section. It's important to go in that order so the colors match their order on the electromagnetic spectrum. They then pushed a pencil through the center of the circle to create a spinner. As the circle spins, the colors do seem to blur together. We couldn't make our circles blur enough to go grey but I did see some dull blues. To make white, we would need to include the 7th color of the spectrum, indigo.

Chromatography Lab - Chromatography is used to separate the components of colored mixtures. The original lab called for using candy such as Skittles but I tried that at home and didn't have great results. Instead, we used markers. The link to the original lab is below if you'd like to try it with Skittles or M&Ms.
Cut a 3"x3" square from a coffee filter. Add a dot of each color marker about 1 cm from the edge of the coffee filter.
Make a salt solution by mixing 1/8 tsp. of table salt into 3 cups of water. Pour a little of the solution into a clear glass or cup. You want the level to be below the dots but the salt solution should touch the very bottom of the coffee filter. Use a binder clip to clip the coffee filter on the side of the cup.
Capillary action will draw the water up through the coffee filter. It will pass through the dots of color and start to separate them. This happens because some dyes are more likely to stick to the paper while others want to mix with the salt water.

References:
The labs "See Through," "Water Prism," and "Blender" were all from Physics for Every Kid.
VanCleave, J. (1991). Physics for Every Kid: 101 Easy Experiments in Motion, Heat, Light, Machines, and Sound. San Francisco: Jossey-Bass.

The Chromatography lab was found on this website: http://chemistry.about.com/od/chemistryexperiments/ht/candychroma.htm

Thursday, March 24, 2011

March 24 - Acids and Bases

We finished up the chemistry portion of our class (and the first half of our semester!) with a study of acids and bases.

I started out by asking a couple of review questions about liquids: Do they have a definite shape? Do they have a definite volume? Do they take up space? I then told the class that almost all liquids they encounter will have either acidic or basic properties. One exception to this is distilled/pure water that is neutral.
We moved on to discuss some acids the students knew about - lemon juice and other citrus fruits and vinegar. They also knew there is acid in batteries. I told them about amino acids that make up proteins and can be found in proteins in our bodies and our foods.

Fun fact: The word acid comes from the Latin acidus meaning sour or sharp. Another word for basic is alkali.

Fun fact: The term pH was introduced in 1909 by the Danish chemist Soren Sorenson. pH stands for pondus hydrogenii meaning potential hydrogen.

Why "potential hydrogen?" When an acid is placed into an aqueous solution, it breaks up into positive hydrogen ions (H+) and another compound. A base, on the other hand, will break up into negative hydroxide (OH-) ions and another compound.

The pH Scale
This scale is used to determine how acidic or basic something is. The scale goes from 0 (most acidic) to 14 (most basic). 7 in the middle is neutral. Solutions that are very basic or very acidic are also very toxic. More H+ ions indicate a lower pH number or more acidity. A greater number of OH- ions indicate a higher pH and a more basic compound. For example, battery acid has a pH below 1. Drain cleaner is a very basic compound that has a pH near 14.
Although there may be many different ions in a substance, the pH scale only focuses on those two listed above: hydrogen and hydroxide.

Green Pennies - This had to sit for 24 hours so I prepped it at home then brought in the pennies to show the class.
For this, I doused a folded paper towel in vinegar then placed four pennies on the towel. I let them sit for almost 24 hours. The acetate in vinegar reacts with the copper of the pennies to form a green coating, copper acetate.


Cleaning Pennies labs - We used two acids to clean dirty pennies; carbonic acid in Coca-Cola and acetic acid in vinegar.
Before we started cleaning, though, I asked the students what they thought causes pennies to become dirty. I gave them a hint: oxidation. The students know oxidation (the reaction between iron and oxygen) causes metal objects to rust. Dirty pennies are caused by a similar reaction. The copper in the pennies reacts with oxygen in the air to form copper oxide. This is a black powder that coats the pennies.
Carbonic acid - For this we just poured some Coke into a cup and added a couple of pennies. It takes a while but the pennies will become nice and shiny.
Acetic acid - We poured 1/4 cup of vinegar into a cup and then stirred in 1 tsp. of salt until it dissolved. Each student then dipped a penny halfway into the vinegar-salt solution and held it for 20 seconds. This is all it took to clean the half of the coin that was in the vinegar.
The acid (either carbonic or acetic) eats away at the copper oxide leaving the pennies clean and shiny. You could also do this with lemon juice (vitamin C is ascorbic acid).


Copper-Plated Nails lab - This is fun to try at home if you have steel nails or screws. After cleaning the pennies with the vinegar and salt, keep the liquid mixture. Positively charged copper ions from the pennies are now floating around in the salt and vinegar. If you place a steel nail or screw in this mixture, the acids will dissolve some of the iron from the steel and will leave a negative charge on the nail. The positive copper ions are then attracted to the negative ions in the nail. The copper then attaches to the nail giving it a slight copper color.
This also creates a little hydrogen gas (the bubbles you will see) as the hydrogen ions in the acid react with the metals in the nail.
I was a little worried this wouldn't work since the website I got this from said to use steel nails/screws. I had boxes upon boxes of galvanised nails and zinc wood screws but no plain old steel ones. We tried it with all of the different nails and screws and actually got a nice result on the wood screws. The galvanised nails are coated with something that protects them from the acids in wood so I had a good feeling this would not work on them. Worth trying, though, since it's part of the learning process!

Before and after photo of the copper-plated wood screw.
Oxidation is also what causes tarnish on silver jewelry and cutlery. This link shows how to make a silver polish/tarnish remover from basic household items. The electrolytes from the baking soda (a base) and the salt (sodium and chloride) react in a similar way to the copper-plating we created in the lab above.

Properties of Acids
1) Acids taste sour. I prompted the students to think of a lemon. If you cut into a lemon and taste it, it's very sour. Taste, however, is not a good way to test for acids. :)

2) Acids are electrolytes. This means they can conduct electricity due to the presence of the positive hydrogen ions. Our bodies require four electrolyte minerals to stay healthy: sodium (Na+), potassium (K+), chloride (Cl-), and phosphorous (HPO-). I asked the students to identify the two electrolytes listed that are acids. We also discussed electrolytes in foods: salts, bananas, Gatorade (and similar products).

3) Acids are corrosive. Some acids react strongly with certain metals and can "eat away" at them. Acids can also be dangerous to human skin.

4) Acids react with certain compounds, called indicators, to produce predictable changes in color. More on this later.

Common Acids
We spoke about some of these at the beginning of class. Vinegar is acetic acid. The acid in car batteries is sulfuric acid. We also know about carbonic acid in sodas and ascorbic acid which is vitamin C. We also discussed stomach acid - hydrochloric acid (HCl). This is an extremely strong acid that helps break up and digest foods.

Properties of Bases
1) In a pure, undissolved state, most bases are crystalline solids. In solution, bases feel slippery and have a bitter taste.

2) Just like their acidic counterparts, bases are corrosive and strong bases such as drain cleaner can cause burns and tissue damage.

3) Remember Cl- and HPO- from above? Bases can be electrolytes, too. The ones with a negative charge (chloride and phosphorous) are the basic electrolytes that the body needs to stay healthy.

4) Bases also react with indicators to produce predictable color changes.

Common Bases
Some common bases are ammonia (NH3); sodium hydroxide (NaOH); and aluminum hydroxide [Al(OH)3]. Ammonia is a cleaner; sodium hydroxide is used in the manufacture of soaps, detergents, pulp for paper, and textiles; and aluminum hydroxide is an ingredient in anti-perspirant.

Acid and Base Testing lab - We used pH paper to test for the presence (and strength) of acids and bases in a variety of materials. This included some citrus fruits (orange, lemon, grapefruit); some coffee; ammonia; and vinegar. The pH paper allowed the students to see where on a pH scale the various items fell.

Testing for Bases lab - We used turmeric paper (a base indicator) to test for the presence of a base in ammonia. We dipped a piece of turmeric paper in some ammonia and watched it turn red.


How to make turmeric paper: Mix 1/3 cup of rubbing alcohol with 1/4 tsp. turmeric. Stir to dissolve then dip coffee filters (the unbleached ones work fine) into the mixture. Place the wet coffee filters on a cooling rack placed on a cookie sheet (to avoid yellow countertops) and let them dry. You can then cut the coffee filters up into strips and use them to test things around the house for bases.

Wet Only lab - This one showed that you must add water in order to test dry solids with the turmeric paper.
I passed around a small amount of baking soda in a cup and asked the students to test it with a dry strip of turmeric paper. The indicator did not react with the dry soda. However, when we dipped the turmeric paper in water then in the baking soda, it turned red. 

Neutral lab - We actually did this last but it used the turmeric paper. In this we neutralized a base. I poured a tiny amount of ammonia into a plastic cup. We used a piece of turmeric paper to show that it really is a base. I then added a tiny amount of vinegar to the ammonia and stirred. The students then dipped a second piece of turmeric paper into the new mixture and saw that the color did not change. 
The acidic vinegar and basic ammonia cancelled each other out and the products formed are neutral.

Baking with Acid? lab - This led into a discussion of leaveners and acids in baked goods.

Step 1: Mix 1 tsp. of baking powder with 2 tbsp. of water.
Step 2: Mix 1 tsp. of baking powder with 2 tbsp. of vinegar.
Step 3: Mix 1 tsp. of baking soda with 2 tbsp. of water.
Step 4: Mix 1 tsp. of baking soda with 2 tbsp. of vinegar.

We observed bubbling and foaming in steps 1, 2, and 4. Step 3 created a milky white solution but no bubbling. 
Baking powder consists largely of sodium bicarbonate (baking soda) and an acid. If you're out of baking powder, you can actually make your own by mixing baking soda and acidic cream of tartar. Adding water to the baking powder activated the acid and created carbon dioxide gas. 
When we added vinegar to the baking powder, it reacted with the sodium bicarbonate to produce CO2
Adding vinegar to the baking soda (sodium bicarbonate) created, you guessed it, more CO2
The carbon dioxide gas created from these reactions in baking pushes the batter of a cake, muffins, or bread up/causes it to rise. The heat of the oven then bakes the batter in this elevated state. When you're baking with baking soda alone, you need to add an acid to create the CO2. Recipes may call for buttermilk, cream of tartar, or vinegar to help the batter rise.


I finished up class with a really quick discussion on acid rain. Acid rain is caused by sulfur and nitrogen compounds (air pollution from factories, car exhausts, etc.) that mix with water vapor in earth's atmosphere to create nitric acid and sulfuric acid. These acids then return to earth as acid precipitation (this could include acid rain, acid snow, acid fog, etc.) Acid rain can cause all sorts of harm from damaging buildings, statues, and trees to leading to water pollution. 
More on acid rain:

Next week:
We'll get back into physics next week by studying waves and light. 

References:
The labs Green Pennies, Baking with Acid?, Wet Only, and Neutral are all from Chemistry for Every Kid. I also got the idea for making turmeric paper from this book. 
VanCleave, J. (1989). Chemistry for Every Kid: 101 Easy Experiments That Really Work. San Francisco: Jossey-Bass.

The lab on cleaning pennies with vinegar and then copper-plating the nails came from this website: 

More information on acids and bases: http://www.chem4kids.com/files/react_acidbase.html

How to make cabbage indicator paper (from Chemistry for Every Kid):
This will produce a testing paper that will indicate both acids and bases. It will turn green in the presence of a base and a pinkish-red in the presence of an acid.
You will need an uncooked red cabbage and distilled water for this.
Fill one jar (or glass bowl) with torn pieces of cabbage leaves. Boil the distilled water and carefully fill the jar or bowl containing the cabbage with the water. Let the jar sit until the water cools to room temperature.
Pour the liquid through a strainer into a second jar or bowl and discard the cabbage leaves.
You can now dip coffee filters into the cabbage juice and let them dry to create a pale blue acid-base testing paper.

Thursday, March 17, 2011

March 17th - Chemical Reactions and Solutions

We spent this class period discussing and observing chemical reactions and solutions. I started out the class by tying this in to our topic from last week, polymers. We discussed a few of the things we worked on last week such as the fake snow and Ooblek and talked about the materials in each of those things that reacted to create the final product. We also talked about the vinegar-baking soda reaction that we're all familiar with. This reaction creates carbon dioxide gas. Mixing yeast and hydrogen peroxide will produce oxygen gas.
I wanted to show the video below but the school network wouldn't let me access the site. Here it is so you can watch it at home. I've viewed it several times and it's completely appropriate for children. :)
http://www.dailymotion.com/video/x9vgeh_chemical-reactions-with-a-flame_tech 

Chemical Reactions
A chemical reaction occurs when two or more molecules interact and something happens. This also causes a chemical change.
We spent a little time talking about oxidation. The students knew this is a fancy name for "rusting." The oxygen in the air reacts with the iron in steel creating the chemical change that is rust.

Catalysts
The students already know that mixing hydrogen and oxygen in certain amounts causes a reaction that produces water. The atoms in this reaction usually bond very slowly. However, if a chemist adds a spark, the reaction speeds up. The spark is an example of a catalyst, something that lowers the amount of energy needed so a reaction can happen easier.

Inhibitors
Inhibitors slow down reactions. I asked the students why they thought scientists would want to use an inhibitor. These can make reactions easier to control which can be helpful!

Types of Reactions
We reviewed endothermic (reactions that take on heat) and exothermic reactions (reactions that give off heat). We also spent a few minutes talking about some other types of chemical reactions: combustion, decay or decomposition, synthesis (a reaction that results in the production of one or more products), digestion, and oxidation.

Breakdown Lab - This lab showed decomposition. We were able to watch hydrogen peroxide (H2O2) decompose or break down into water and oxygen gas.
I cut a slice from a raw potato and then poured some hydrogen peroxide in a cup. We placed the potato slice into the hydrogen peroxide and then watched as oxygen gas bubbles were produced.


Potatoes contain an enzyme (chemicals found in cells) called catalase (what does that sound like? Catalyst, perhaps?) The breakdown of hydrogen peroxide is actually quite a slow process but the catalase really does act like a catalyst to help the H2O2 break down quickly.

Curds and Whey Lab - This is another one that showed decomposition. For this, we broke milk down into its basic parts: curds (solids) and whey (liquid). We poured a little milk into a baby food jar and then added two tablespoons of vinegar and stirred. As the two liquids mixed, they separated into the two parts and we were able to see some lumpy solids in the milk (curds). After the jar sat for a while, we saw a clear layer (whey) on the top of the milk.

We then completed a few labs on starches. The students had a good idea of things that include starch. We also spent some time talking about how starches are polymers as well as the structure of a starch. Starches are long twisted sets of molecules that have branches coming off them.
Here are some pictures of starches so students can see what that description means (cellulose [found in the cell walls of plants] and amylose [one of the two components that make up starches]):
http://wiki.chemprime.chemeddl.org/images/4/4c/Structures_of_Cellulose_and_Amylose_.jpg

Starch I.D. Lab - This lab showed the students that iodine is a starch indicator. Iodine is a great starch indicator and turns a purple-blue color when it comes in contact with a starch. It remains brown on anything that does not contain a starch.
For this, each student was given a little bit of flour on a paper plate. We mixed a few tablespoons of water in with the flour and stirred well. I then added three drops of iodine to the flour and water mixtures. The students noticed the water turned the purple-blue color to indicate the presence of starch in flour.


Magic Writing Lab - We made an iodine-water solution by mixing a few drops of iodine into a shallow bowl of water. I then squeezed a lemon and gave each student a piece of paper and a paintbrush. The students "painted" a message on the paper with the lemon juice and then let it dry. Once the lemon juice was mostly dry, we dunked the paper into the iodine mixture and observed. The students noticed that the paper started to turn a faint purple while their lemon juice messages stayed white.
Paper contains starch so the iodine reacts with the starch in the paper. Vitamin C and iodine combine to form a colorless molecule which explains why the part with the juice message did not turn purple.

Testing for Starch - We used this lab to test for starches in a variety of foods. The students were each given a piece of cheese, an apple slice, a slice of raw potato, a piece of bread, a saltine cracker, and some sugar. They made predictions about which contain starch then added one drop of iodine to each food item and watched. We noticed that the drops of iodine on the bread, potato, and cracker each turned blue.


Solutions
Simply put, a solution is a special type of mixture. Solutions are classified as homogenous mixtures because the components are evenly mixed (there is an even concentration of the substances in the mixture). Heterogeneous mixtures, on the other hand, are not evenly mixed. There may be a higher concentration of one substance than another. I gave the example of sugar and water and sand and water. If we were to mix sugar into a glass of water, it would eventually dissolve and the sugar would spread evenly throughout the water. Sand would not dissolve; it would just sink to the bottom of the glass. The sugar and water is a homogenous mixture or a solution while the sand and water is a heterogeneous mixture.

Solutes and Solvents
Solutions have different parts. One is the solute which is the substance to be dissolved. In the example above, sugar is the solute.
There is also the solvent. This is the substance the solute is dissolved into. That would be the water in the sugar-water solution from above.
Another example is a soda which is a solution of carbon dioxide gas (the solute) mixed into water (the solvent). There is usually more solvent than solute.

Solubility
Solubility is used to describe how well a solvent can dissolve a solute. Solid solutes dissolve more easily (become more soluble) when the temperature of the solvent is increased. For example, it's easier to dissolve a spoonful of sugar in a mug of hot tea than it is in a glass of iced tea.
Gaseous solutes dissolve more easily when the pressure of the solvent is increased. Adding heat actually makes a gas less soluble. The soda example can be used here. A brand-new, unopened soda contains CO2 gas that is under quite a bit of pressure. When you open the cap, you release some of that pressure (this is what creates that "pssssh" sound). Soda or carbonated water stays fizzy while the bottle is closed because the cap keeps the gas under pressure and makes it easier for the CO2 to dissolve in the water.

Alloys
Alloys are made by melting two or more elements (one must be a metal) and then cooling them so they become solid. Examples of alloys include bronze (mostly copper and tin), brass (copper and zinc), sterling silver (mostly silver and copper), and 14K gold (pure gold is 24K so 14K gold is 14 parts gold and 10 parts of some other metal).
Bicycle frames are often made of aluminum alloys. Aluminum is a light metal but it can be strengthened by adding other elements such as magnesium, zinc, and silicon.
Phew, it was hard not to say or type "aluminium" during this lesson/blog entry. ;)
Some very high-end bicycles and cars are made with carbon fibre which is a composite of epoxy (another polymer) and graphite. Carbon fibre can also be reinforced with aluminum or Kevlar (polymer!)

To finish up class we discussed oil and its solubility in water. The students knew oil and water did not mix but we did some fun labs to prove this (and learned some new words [immiscible and emulsion] in the process!)

Floating Spheres Lab - In this lab we floated spheres of food coloring between layers of water and oil.
We poured 1/4 cup of water and 1/4 cup of cooking oil into a plastic cup. The water is heavier than the oil so it sank to the bottom. We then added a few drops of food coloring to the cup and looked to see where the drops ended up. The balls of food coloring floated in the oily layer.
Here's an extra part of this lab to try at home. Follow the directions as above (add about 5 drops of food coloring) but try pushing the drops of food coloring into the water layer. They should break apart and dissolve in the water.


Oil and water are immiscible which is a fancy science word meaning they don't mix. No matter how much you stir or shake, they will separate with water on the bottom and the lighter oil on the top. Food coloring will not dissolve in the oil so those little spheres of color will remain. Since the oil and water won't mix, the oil also prevents the food coloring from touching the water (unless of course you push them with a pencil!)

Immiscible Lab - This lab showed the separation of oil and water into an emulsion (a combination of two immiscible liquids).
We poured 1/2 cup of water into a jar and added a few drops of blue food coloring. We then added 1/4 cup of cooking oil. I closed the lid of the jar tightly and then had the students shake the jar to attempt to mix the oil, food coloring, and water.
As we know, oil and water are immiscible. When the students shook the jar, the oil, water, and food coloring mixed temporarily but immediately started to separate once we put the jar down. This also proves that food coloring is water soluble but is not soluble in the oil. At first, both the oil and water had a blue tint from the food coloring. However, as the jar sat undisturbed, the oil started to lose its blue coloring.


Here's a link to a lab to try at home. This is another one that shows the decomposition of H2O2 (hydrogen peroxide). This will create water and oxygen gas. Yeast acts as a catalyst in this lab.
The Decomposition of Hydrogen Peroxide

More information on catalysts.

More on solutions.

More on alloys (with info. on amalgams and emulsions)

Next Week: Acids and Bases


References:
The labs we completed today are all from Janice VanCleave's Chemistry for Every Kid.
VanCleave, J. (1989). Chemistry for Every Kid: 101 Easy Experiments That Really Work. San Francisco: Jossey-Bass.


Red Velvet Cupcakes
I wanted to include a little bit about red velvet during today's class since these cupcakes (along with most cooking) includes some pretty cool chemistry. Red velvet cake is a Southern tradition. It started out as a chocolate cake with a reddish hue. Acids and bases in the original red velvet recipes react to create a beautiful reddish-brown cake. Unfortunately, these cakes have become a shadow of their former selves; most modern recipes include only a tiny amount of cocoa powder and they almost all use red food coloring to provide the "red" in red velvet. 
Apparently the proper thing to do is to slather a good amount of cream cheese frosting on these cakes. Buttercream is a good alternative if you're not a big cream cheese frosting fan.


Here's how the chemistry works:
Natural (not Dutch process) cocoa powder contains pigments that turn red when mixed with acids. Traditional red velvet recipes include acidic ingredients such as buttermilk, Greek yogurt, and/or vinegar (I used all three) to produce the red color.
More information on the chemistry of red velvet


I made two versions of a red velvet recipe for the students to try. Neither one turned out very "red" but they were both very velvety and moist. Yum! :) I tried adding pureed beets (canned sliced beets that had a good long spin in the food processor) to one batch of cake batter since I'd read that would make a more red cake. For the other batch, I followed the same recipe but left out the beets. I did add a little (1 tbsp.) of vinegar to that second batch. I actually found the beet-free cakes to be the more reddish-brown of the two. Not what I expected!


Here's the recipe I based mine on:
Not so red but oh so velvet cupcakes (from the Home-Ec 101 blog)
Since this recipe uses a liquid fat (no need to cream the butter and sugar), I used what Alton Brown refers to as the "Muffin Method" to make the batter. Combine the dry ingredients (flour, baking soda, baking powder, cocoa, and salt) in one bowl. The wet ingredients (beets/vinegar, yogurt, buttermilk, eggs, oil) and sugar get mixed together in a second bowl. Then mix the wet ingredients into the dry and mix just until they're all combined.
It's a really easy recipe and a fun one for the children to help with. 
Hint: To make the 1/4 cup of buttermilk for this recipe, you can just add 1/4 tbsp. vinegar to 1/4 cup of milk. Mix and let it stand for about 10 minutes. 


More on food chemistry from Penn State University
Even more kitchen chemistry!