Thursday, March 24, 2011

March 24 - Acids and Bases

We finished up the chemistry portion of our class (and the first half of our semester!) with a study of acids and bases.

I started out by asking a couple of review questions about liquids: Do they have a definite shape? Do they have a definite volume? Do they take up space? I then told the class that almost all liquids they encounter will have either acidic or basic properties. One exception to this is distilled/pure water that is neutral.
We moved on to discuss some acids the students knew about - lemon juice and other citrus fruits and vinegar. They also knew there is acid in batteries. I told them about amino acids that make up proteins and can be found in proteins in our bodies and our foods.

Fun fact: The word acid comes from the Latin acidus meaning sour or sharp. Another word for basic is alkali.

Fun fact: The term pH was introduced in 1909 by the Danish chemist Soren Sorenson. pH stands for pondus hydrogenii meaning potential hydrogen.

Why "potential hydrogen?" When an acid is placed into an aqueous solution, it breaks up into positive hydrogen ions (H+) and another compound. A base, on the other hand, will break up into negative hydroxide (OH-) ions and another compound.

The pH Scale
This scale is used to determine how acidic or basic something is. The scale goes from 0 (most acidic) to 14 (most basic). 7 in the middle is neutral. Solutions that are very basic or very acidic are also very toxic. More H+ ions indicate a lower pH number or more acidity. A greater number of OH- ions indicate a higher pH and a more basic compound. For example, battery acid has a pH below 1. Drain cleaner is a very basic compound that has a pH near 14.
Although there may be many different ions in a substance, the pH scale only focuses on those two listed above: hydrogen and hydroxide.

Green Pennies - This had to sit for 24 hours so I prepped it at home then brought in the pennies to show the class.
For this, I doused a folded paper towel in vinegar then placed four pennies on the towel. I let them sit for almost 24 hours. The acetate in vinegar reacts with the copper of the pennies to form a green coating, copper acetate.


Cleaning Pennies labs - We used two acids to clean dirty pennies; carbonic acid in Coca-Cola and acetic acid in vinegar.
Before we started cleaning, though, I asked the students what they thought causes pennies to become dirty. I gave them a hint: oxidation. The students know oxidation (the reaction between iron and oxygen) causes metal objects to rust. Dirty pennies are caused by a similar reaction. The copper in the pennies reacts with oxygen in the air to form copper oxide. This is a black powder that coats the pennies.
Carbonic acid - For this we just poured some Coke into a cup and added a couple of pennies. It takes a while but the pennies will become nice and shiny.
Acetic acid - We poured 1/4 cup of vinegar into a cup and then stirred in 1 tsp. of salt until it dissolved. Each student then dipped a penny halfway into the vinegar-salt solution and held it for 20 seconds. This is all it took to clean the half of the coin that was in the vinegar.
The acid (either carbonic or acetic) eats away at the copper oxide leaving the pennies clean and shiny. You could also do this with lemon juice (vitamin C is ascorbic acid).


Copper-Plated Nails lab - This is fun to try at home if you have steel nails or screws. After cleaning the pennies with the vinegar and salt, keep the liquid mixture. Positively charged copper ions from the pennies are now floating around in the salt and vinegar. If you place a steel nail or screw in this mixture, the acids will dissolve some of the iron from the steel and will leave a negative charge on the nail. The positive copper ions are then attracted to the negative ions in the nail. The copper then attaches to the nail giving it a slight copper color.
This also creates a little hydrogen gas (the bubbles you will see) as the hydrogen ions in the acid react with the metals in the nail.
I was a little worried this wouldn't work since the website I got this from said to use steel nails/screws. I had boxes upon boxes of galvanised nails and zinc wood screws but no plain old steel ones. We tried it with all of the different nails and screws and actually got a nice result on the wood screws. The galvanised nails are coated with something that protects them from the acids in wood so I had a good feeling this would not work on them. Worth trying, though, since it's part of the learning process!

Before and after photo of the copper-plated wood screw.
Oxidation is also what causes tarnish on silver jewelry and cutlery. This link shows how to make a silver polish/tarnish remover from basic household items. The electrolytes from the baking soda (a base) and the salt (sodium and chloride) react in a similar way to the copper-plating we created in the lab above.

Properties of Acids
1) Acids taste sour. I prompted the students to think of a lemon. If you cut into a lemon and taste it, it's very sour. Taste, however, is not a good way to test for acids. :)

2) Acids are electrolytes. This means they can conduct electricity due to the presence of the positive hydrogen ions. Our bodies require four electrolyte minerals to stay healthy: sodium (Na+), potassium (K+), chloride (Cl-), and phosphorous (HPO-). I asked the students to identify the two electrolytes listed that are acids. We also discussed electrolytes in foods: salts, bananas, Gatorade (and similar products).

3) Acids are corrosive. Some acids react strongly with certain metals and can "eat away" at them. Acids can also be dangerous to human skin.

4) Acids react with certain compounds, called indicators, to produce predictable changes in color. More on this later.

Common Acids
We spoke about some of these at the beginning of class. Vinegar is acetic acid. The acid in car batteries is sulfuric acid. We also know about carbonic acid in sodas and ascorbic acid which is vitamin C. We also discussed stomach acid - hydrochloric acid (HCl). This is an extremely strong acid that helps break up and digest foods.

Properties of Bases
1) In a pure, undissolved state, most bases are crystalline solids. In solution, bases feel slippery and have a bitter taste.

2) Just like their acidic counterparts, bases are corrosive and strong bases such as drain cleaner can cause burns and tissue damage.

3) Remember Cl- and HPO- from above? Bases can be electrolytes, too. The ones with a negative charge (chloride and phosphorous) are the basic electrolytes that the body needs to stay healthy.

4) Bases also react with indicators to produce predictable color changes.

Common Bases
Some common bases are ammonia (NH3); sodium hydroxide (NaOH); and aluminum hydroxide [Al(OH)3]. Ammonia is a cleaner; sodium hydroxide is used in the manufacture of soaps, detergents, pulp for paper, and textiles; and aluminum hydroxide is an ingredient in anti-perspirant.

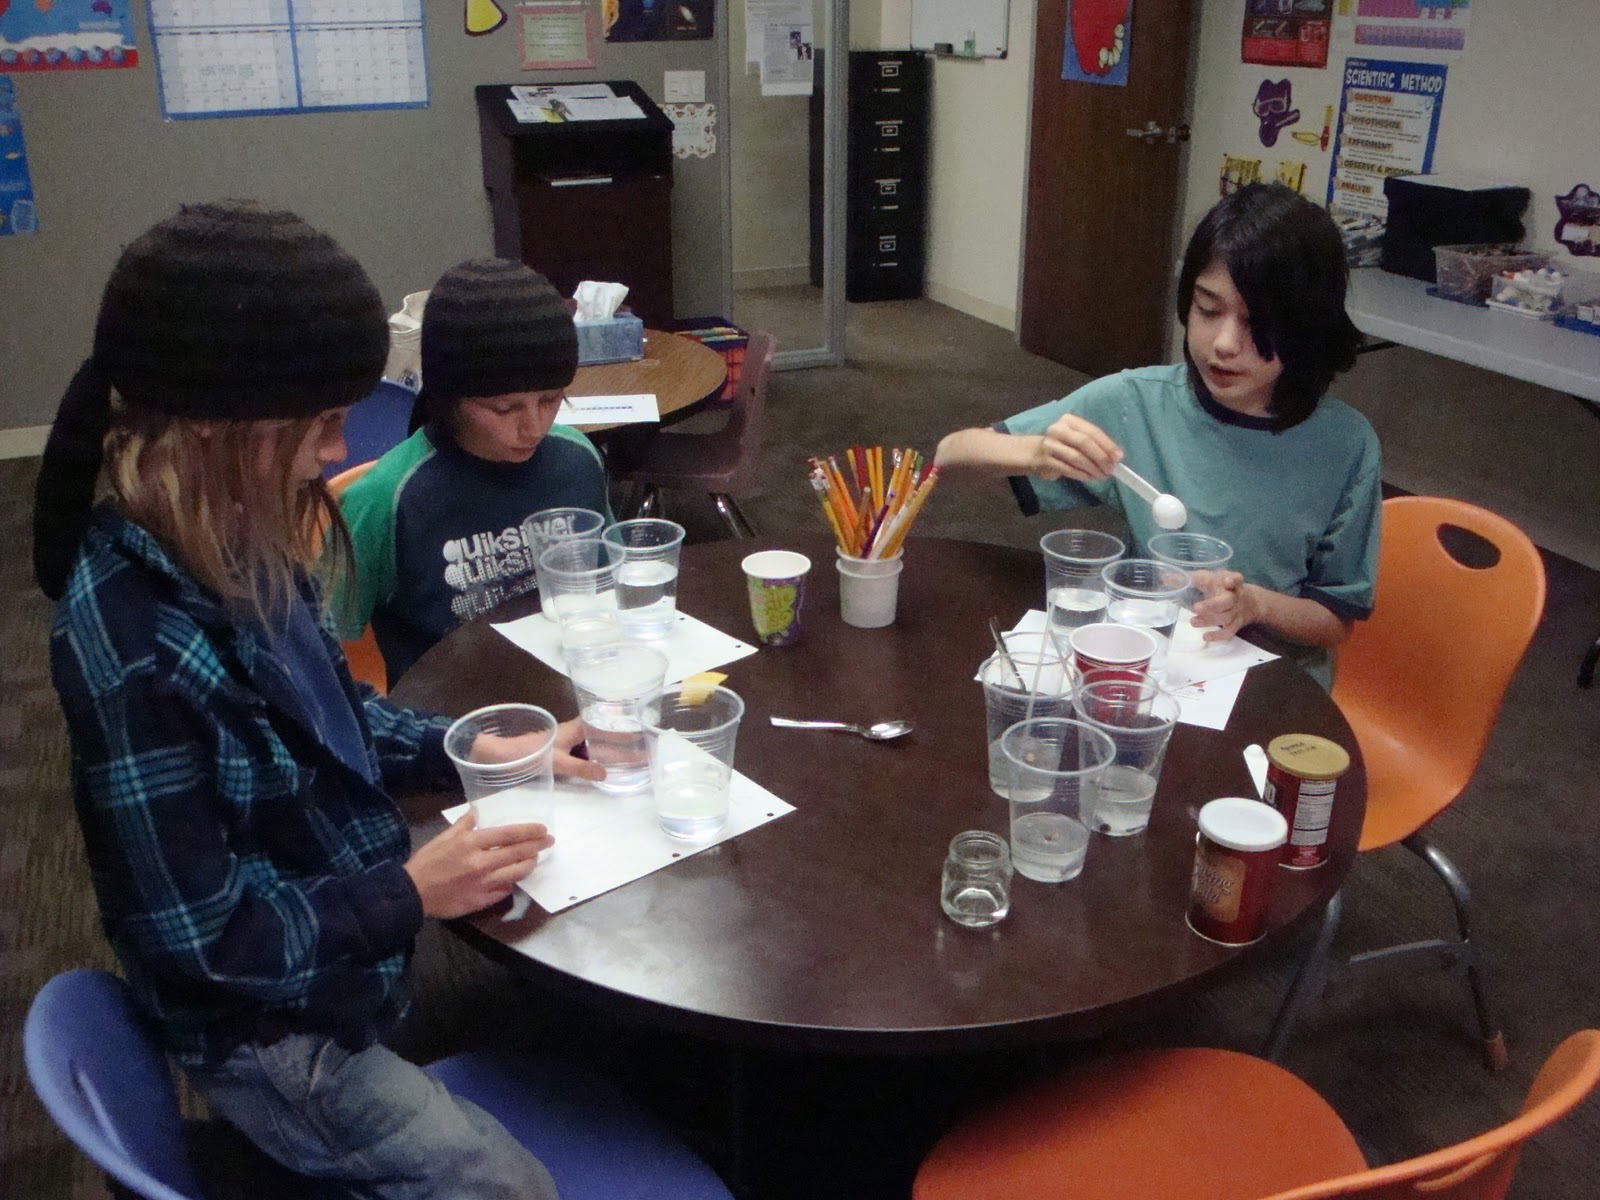
Acid and Base Testing lab - We used pH paper to test for the presence (and strength) of acids and bases in a variety of materials. This included some citrus fruits (orange, lemon, grapefruit); some coffee; ammonia; and vinegar. The pH paper allowed the students to see where on a pH scale the various items fell.

Testing for Bases lab - We used turmeric paper (a base indicator) to test for the presence of a base in ammonia. We dipped a piece of turmeric paper in some ammonia and watched it turn red.


How to make turmeric paper: Mix 1/3 cup of rubbing alcohol with 1/4 tsp. turmeric. Stir to dissolve then dip coffee filters (the unbleached ones work fine) into the mixture. Place the wet coffee filters on a cooling rack placed on a cookie sheet (to avoid yellow countertops) and let them dry. You can then cut the coffee filters up into strips and use them to test things around the house for bases.

Wet Only lab - This one showed that you must add water in order to test dry solids with the turmeric paper.
I passed around a small amount of baking soda in a cup and asked the students to test it with a dry strip of turmeric paper. The indicator did not react with the dry soda. However, when we dipped the turmeric paper in water then in the baking soda, it turned red. 

Neutral lab - We actually did this last but it used the turmeric paper. In this we neutralized a base. I poured a tiny amount of ammonia into a plastic cup. We used a piece of turmeric paper to show that it really is a base. I then added a tiny amount of vinegar to the ammonia and stirred. The students then dipped a second piece of turmeric paper into the new mixture and saw that the color did not change. 
The acidic vinegar and basic ammonia cancelled each other out and the products formed are neutral.

Baking with Acid? lab - This led into a discussion of leaveners and acids in baked goods.

Step 1: Mix 1 tsp. of baking powder with 2 tbsp. of water.
Step 2: Mix 1 tsp. of baking powder with 2 tbsp. of vinegar.
Step 3: Mix 1 tsp. of baking soda with 2 tbsp. of water.
Step 4: Mix 1 tsp. of baking soda with 2 tbsp. of vinegar.

We observed bubbling and foaming in steps 1, 2, and 4. Step 3 created a milky white solution but no bubbling. 
Baking powder consists largely of sodium bicarbonate (baking soda) and an acid. If you're out of baking powder, you can actually make your own by mixing baking soda and acidic cream of tartar. Adding water to the baking powder activated the acid and created carbon dioxide gas. 
When we added vinegar to the baking powder, it reacted with the sodium bicarbonate to produce CO2
Adding vinegar to the baking soda (sodium bicarbonate) created, you guessed it, more CO2
The carbon dioxide gas created from these reactions in baking pushes the batter of a cake, muffins, or bread up/causes it to rise. The heat of the oven then bakes the batter in this elevated state. When you're baking with baking soda alone, you need to add an acid to create the CO2. Recipes may call for buttermilk, cream of tartar, or vinegar to help the batter rise.


I finished up class with a really quick discussion on acid rain. Acid rain is caused by sulfur and nitrogen compounds (air pollution from factories, car exhausts, etc.) that mix with water vapor in earth's atmosphere to create nitric acid and sulfuric acid. These acids then return to earth as acid precipitation (this could include acid rain, acid snow, acid fog, etc.) Acid rain can cause all sorts of harm from damaging buildings, statues, and trees to leading to water pollution. 
More on acid rain:

Next week:
We'll get back into physics next week by studying waves and light. 

References:
The labs Green Pennies, Baking with Acid?, Wet Only, and Neutral are all from Chemistry for Every Kid. I also got the idea for making turmeric paper from this book. 
VanCleave, J. (1989). Chemistry for Every Kid: 101 Easy Experiments That Really Work. San Francisco: Jossey-Bass.

The lab on cleaning pennies with vinegar and then copper-plating the nails came from this website: 

More information on acids and bases: http://www.chem4kids.com/files/react_acidbase.html

How to make cabbage indicator paper (from Chemistry for Every Kid):
This will produce a testing paper that will indicate both acids and bases. It will turn green in the presence of a base and a pinkish-red in the presence of an acid.
You will need an uncooked red cabbage and distilled water for this.
Fill one jar (or glass bowl) with torn pieces of cabbage leaves. Boil the distilled water and carefully fill the jar or bowl containing the cabbage with the water. Let the jar sit until the water cools to room temperature.
Pour the liquid through a strainer into a second jar or bowl and discard the cabbage leaves.
You can now dip coffee filters into the cabbage juice and let them dry to create a pale blue acid-base testing paper.

Thursday, March 17, 2011

March 17th - Chemical Reactions and Solutions

We spent this class period discussing and observing chemical reactions and solutions. I started out the class by tying this in to our topic from last week, polymers. We discussed a few of the things we worked on last week such as the fake snow and Ooblek and talked about the materials in each of those things that reacted to create the final product. We also talked about the vinegar-baking soda reaction that we're all familiar with. This reaction creates carbon dioxide gas. Mixing yeast and hydrogen peroxide will produce oxygen gas.
I wanted to show the video below but the school network wouldn't let me access the site. Here it is so you can watch it at home. I've viewed it several times and it's completely appropriate for children. :)
http://www.dailymotion.com/video/x9vgeh_chemical-reactions-with-a-flame_tech 

Chemical Reactions
A chemical reaction occurs when two or more molecules interact and something happens. This also causes a chemical change.
We spent a little time talking about oxidation. The students knew this is a fancy name for "rusting." The oxygen in the air reacts with the iron in steel creating the chemical change that is rust.

Catalysts
The students already know that mixing hydrogen and oxygen in certain amounts causes a reaction that produces water. The atoms in this reaction usually bond very slowly. However, if a chemist adds a spark, the reaction speeds up. The spark is an example of a catalyst, something that lowers the amount of energy needed so a reaction can happen easier.

Inhibitors
Inhibitors slow down reactions. I asked the students why they thought scientists would want to use an inhibitor. These can make reactions easier to control which can be helpful!

Types of Reactions
We reviewed endothermic (reactions that take on heat) and exothermic reactions (reactions that give off heat). We also spent a few minutes talking about some other types of chemical reactions: combustion, decay or decomposition, synthesis (a reaction that results in the production of one or more products), digestion, and oxidation.

Breakdown Lab - This lab showed decomposition. We were able to watch hydrogen peroxide (H2O2) decompose or break down into water and oxygen gas.
I cut a slice from a raw potato and then poured some hydrogen peroxide in a cup. We placed the potato slice into the hydrogen peroxide and then watched as oxygen gas bubbles were produced.


Potatoes contain an enzyme (chemicals found in cells) called catalase (what does that sound like? Catalyst, perhaps?) The breakdown of hydrogen peroxide is actually quite a slow process but the catalase really does act like a catalyst to help the H2O2 break down quickly.

Curds and Whey Lab - This is another one that showed decomposition. For this, we broke milk down into its basic parts: curds (solids) and whey (liquid). We poured a little milk into a baby food jar and then added two tablespoons of vinegar and stirred. As the two liquids mixed, they separated into the two parts and we were able to see some lumpy solids in the milk (curds). After the jar sat for a while, we saw a clear layer (whey) on the top of the milk.

We then completed a few labs on starches. The students had a good idea of things that include starch. We also spent some time talking about how starches are polymers as well as the structure of a starch. Starches are long twisted sets of molecules that have branches coming off them.
Here are some pictures of starches so students can see what that description means (cellulose [found in the cell walls of plants] and amylose [one of the two components that make up starches]):
http://wiki.chemprime.chemeddl.org/images/4/4c/Structures_of_Cellulose_and_Amylose_.jpg

Starch I.D. Lab - This lab showed the students that iodine is a starch indicator. Iodine is a great starch indicator and turns a purple-blue color when it comes in contact with a starch. It remains brown on anything that does not contain a starch.
For this, each student was given a little bit of flour on a paper plate. We mixed a few tablespoons of water in with the flour and stirred well. I then added three drops of iodine to the flour and water mixtures. The students noticed the water turned the purple-blue color to indicate the presence of starch in flour.


Magic Writing Lab - We made an iodine-water solution by mixing a few drops of iodine into a shallow bowl of water. I then squeezed a lemon and gave each student a piece of paper and a paintbrush. The students "painted" a message on the paper with the lemon juice and then let it dry. Once the lemon juice was mostly dry, we dunked the paper into the iodine mixture and observed. The students noticed that the paper started to turn a faint purple while their lemon juice messages stayed white.
Paper contains starch so the iodine reacts with the starch in the paper. Vitamin C and iodine combine to form a colorless molecule which explains why the part with the juice message did not turn purple.

Testing for Starch - We used this lab to test for starches in a variety of foods. The students were each given a piece of cheese, an apple slice, a slice of raw potato, a piece of bread, a saltine cracker, and some sugar. They made predictions about which contain starch then added one drop of iodine to each food item and watched. We noticed that the drops of iodine on the bread, potato, and cracker each turned blue.


Solutions
Simply put, a solution is a special type of mixture. Solutions are classified as homogenous mixtures because the components are evenly mixed (there is an even concentration of the substances in the mixture). Heterogeneous mixtures, on the other hand, are not evenly mixed. There may be a higher concentration of one substance than another. I gave the example of sugar and water and sand and water. If we were to mix sugar into a glass of water, it would eventually dissolve and the sugar would spread evenly throughout the water. Sand would not dissolve; it would just sink to the bottom of the glass. The sugar and water is a homogenous mixture or a solution while the sand and water is a heterogeneous mixture.

Solutes and Solvents
Solutions have different parts. One is the solute which is the substance to be dissolved. In the example above, sugar is the solute.
There is also the solvent. This is the substance the solute is dissolved into. That would be the water in the sugar-water solution from above.
Another example is a soda which is a solution of carbon dioxide gas (the solute) mixed into water (the solvent). There is usually more solvent than solute.

Solubility
Solubility is used to describe how well a solvent can dissolve a solute. Solid solutes dissolve more easily (become more soluble) when the temperature of the solvent is increased. For example, it's easier to dissolve a spoonful of sugar in a mug of hot tea than it is in a glass of iced tea.
Gaseous solutes dissolve more easily when the pressure of the solvent is increased. Adding heat actually makes a gas less soluble. The soda example can be used here. A brand-new, unopened soda contains CO2 gas that is under quite a bit of pressure. When you open the cap, you release some of that pressure (this is what creates that "pssssh" sound). Soda or carbonated water stays fizzy while the bottle is closed because the cap keeps the gas under pressure and makes it easier for the CO2 to dissolve in the water.

Alloys
Alloys are made by melting two or more elements (one must be a metal) and then cooling them so they become solid. Examples of alloys include bronze (mostly copper and tin), brass (copper and zinc), sterling silver (mostly silver and copper), and 14K gold (pure gold is 24K so 14K gold is 14 parts gold and 10 parts of some other metal).
Bicycle frames are often made of aluminum alloys. Aluminum is a light metal but it can be strengthened by adding other elements such as magnesium, zinc, and silicon.
Phew, it was hard not to say or type "aluminium" during this lesson/blog entry. ;)
Some very high-end bicycles and cars are made with carbon fibre which is a composite of epoxy (another polymer) and graphite. Carbon fibre can also be reinforced with aluminum or Kevlar (polymer!)

To finish up class we discussed oil and its solubility in water. The students knew oil and water did not mix but we did some fun labs to prove this (and learned some new words [immiscible and emulsion] in the process!)

Floating Spheres Lab - In this lab we floated spheres of food coloring between layers of water and oil.
We poured 1/4 cup of water and 1/4 cup of cooking oil into a plastic cup. The water is heavier than the oil so it sank to the bottom. We then added a few drops of food coloring to the cup and looked to see where the drops ended up. The balls of food coloring floated in the oily layer.
Here's an extra part of this lab to try at home. Follow the directions as above (add about 5 drops of food coloring) but try pushing the drops of food coloring into the water layer. They should break apart and dissolve in the water.


Oil and water are immiscible which is a fancy science word meaning they don't mix. No matter how much you stir or shake, they will separate with water on the bottom and the lighter oil on the top. Food coloring will not dissolve in the oil so those little spheres of color will remain. Since the oil and water won't mix, the oil also prevents the food coloring from touching the water (unless of course you push them with a pencil!)

Immiscible Lab - This lab showed the separation of oil and water into an emulsion (a combination of two immiscible liquids).
We poured 1/2 cup of water into a jar and added a few drops of blue food coloring. We then added 1/4 cup of cooking oil. I closed the lid of the jar tightly and then had the students shake the jar to attempt to mix the oil, food coloring, and water.
As we know, oil and water are immiscible. When the students shook the jar, the oil, water, and food coloring mixed temporarily but immediately started to separate once we put the jar down. This also proves that food coloring is water soluble but is not soluble in the oil. At first, both the oil and water had a blue tint from the food coloring. However, as the jar sat undisturbed, the oil started to lose its blue coloring.


Here's a link to a lab to try at home. This is another one that shows the decomposition of H2O2 (hydrogen peroxide). This will create water and oxygen gas. Yeast acts as a catalyst in this lab.
The Decomposition of Hydrogen Peroxide

More information on catalysts.

More on solutions.

More on alloys (with info. on amalgams and emulsions)

Next Week: Acids and Bases


References:
The labs we completed today are all from Janice VanCleave's Chemistry for Every Kid.
VanCleave, J. (1989). Chemistry for Every Kid: 101 Easy Experiments That Really Work. San Francisco: Jossey-Bass.


Red Velvet Cupcakes
I wanted to include a little bit about red velvet during today's class since these cupcakes (along with most cooking) includes some pretty cool chemistry. Red velvet cake is a Southern tradition. It started out as a chocolate cake with a reddish hue. Acids and bases in the original red velvet recipes react to create a beautiful reddish-brown cake. Unfortunately, these cakes have become a shadow of their former selves; most modern recipes include only a tiny amount of cocoa powder and they almost all use red food coloring to provide the "red" in red velvet. 
Apparently the proper thing to do is to slather a good amount of cream cheese frosting on these cakes. Buttercream is a good alternative if you're not a big cream cheese frosting fan.


Here's how the chemistry works:
Natural (not Dutch process) cocoa powder contains pigments that turn red when mixed with acids. Traditional red velvet recipes include acidic ingredients such as buttermilk, Greek yogurt, and/or vinegar (I used all three) to produce the red color.
More information on the chemistry of red velvet


I made two versions of a red velvet recipe for the students to try. Neither one turned out very "red" but they were both very velvety and moist. Yum! :) I tried adding pureed beets (canned sliced beets that had a good long spin in the food processor) to one batch of cake batter since I'd read that would make a more red cake. For the other batch, I followed the same recipe but left out the beets. I did add a little (1 tbsp.) of vinegar to that second batch. I actually found the beet-free cakes to be the more reddish-brown of the two. Not what I expected!


Here's the recipe I based mine on:
Not so red but oh so velvet cupcakes (from the Home-Ec 101 blog)
Since this recipe uses a liquid fat (no need to cream the butter and sugar), I used what Alton Brown refers to as the "Muffin Method" to make the batter. Combine the dry ingredients (flour, baking soda, baking powder, cocoa, and salt) in one bowl. The wet ingredients (beets/vinegar, yogurt, buttermilk, eggs, oil) and sugar get mixed together in a second bowl. Then mix the wet ingredients into the dry and mix just until they're all combined.
It's a really easy recipe and a fun one for the children to help with. 
Hint: To make the 1/4 cup of buttermilk for this recipe, you can just add 1/4 tbsp. vinegar to 1/4 cup of milk. Mix and let it stand for about 10 minutes. 


More on food chemistry from Penn State University
Even more kitchen chemistry! 

Monday, March 14, 2011

March 10 - Polymers

We started this week's class with a mini lesson on pi and circles. March 14th is Pi Day (3/14 - 3.14) so I thought it would be fun to talk about that for a few minutes.
We talked a little about the number pi: it's an irrational number meaning it will go on infinitely without repeating. So far, mathematicians have been able to use super computers to calculate more than two billion digits of pi. This long strand of digits actually made pi fit in nicely with today's lesson; polymers also form long strands.

In case you're curious, here are the first million digits of pi.
http://www.piday.org/million.php

We talked about how we use pi to find the circumference and area of a circle. The circumference is pi multiplied by the diameter while the area is pi times the radius squared. You will end up with pi any time you divide the circumference of a circle by its diameter. It does not matter how big or small the circle is.

Pi Unrolled animation:
http://commons.wikimedia.org/wiki/File:Pi-unrolled_slow.gif

More information on pi:
http://www.historyforkids.org/scienceforkids/math/geometry/pi.htm

http://www.faqkids.com/161-what-is-pi.html

March 14th is also Albert Einstein's birthday. He was born on March 14th, 1879. We spent a little time talking about Einstein. He was awarded the 1921 Nobel Prize for Physics and, in 1955, the 99th element of the periodic table, Einsteinium, was named after him.

More information on Albert Einstein:
http://www.biography.com/bio4kids/bio4kids-einstein.jsp

Polymers
Polymers are really quite fascinating. We encounter them on a daily basis but may not know it. As simple as that plastic bag or piece of PVC pipe may seem on the outside, the chemistry of those objects is pretty complex.

We've looked at the periodic table several times in this class. Each of the symbols stands for one atom on that element. So, if we just wrote down H, it would stand for one atom of hydrogen. Atoms can join with other atoms to form molecules. That one atom of hydrogen could join with another atom of hydrogen to form H2, one molecule of hydrogen. If we added one atom of oxygen to that molecule of hydrogen, they would form H2O or water. I drew pictures on the board to show these bonds.
Water is a relatively small molecule but some molecules are really big. Vitamin C, for example, is written as C6H8O6. That's 20 atoms! I drew a vitamin C molecule on the board and then told the students we could move those 20 atoms around a bit and, while we'd still have six atoms of carbon, eight of hydrogen, and six of oxygen, it would not be vitamin C. How molecules are bonded determines how they act and react. We'll get into chemical reactions more next week.

A polymer is a chain of many molecules that join together. Scientists call each of those molecules monomers. I wrote the words polymer and monomer on the board and explained that mono means one and poly means many. Some polymers are linear polymers meaning they join together to form a long chain. Others are branched polymers; these have a chain with lots of branches coming off it.

Types of polymers
Polymers can be natural or synthetic. Natural polymers include rubber; starch; glucose (the sugar formed by plants as a product of photosynthesis); wood; chitin (found in the shells of shellfish, exoskeletons of bugs, and the cell walls of mushrooms); and proteins in foods as well as your skin, hair, and fingernails.
Synthetic polymers often come in the form of plastics. These include PVC (polyvinylchloride), nylon, Styrofoam (polystyrene), polypropylene (#5 plastic), and polyethylene (#2 plastic).
Click here to see how monomers join together to form polymers.
Teflon (used to make non-stick coating for pans as well as thread-seal tape for plumbing) is known as polytetrafluoroethylene or PTFE. Even Kevlar is a synthetic polymer.

Polymer labs and projects
Expanding Gummy Bears
Gummy bears are made with gelatin, a natural polymer. This lab showed diffusion, the movement of water into another substance.
I had two gummy bears that I soaked in water overnight. One was soaked in regular tap water; the other sat in distilled water. Each student was given one dry gummy bear and asked to measure it. We found that a new, dry gummy bear measured about 1 1/2 cm. We then measured the gummy bears that had been soaking. Diffusion caused the bear from the distilled water to expand to 3 1/2 cm while the bear that had been in tap water expanded to 3 cm.

Balloon Trick
The students used a bamboo skewer to pierce a balloon without popping the balloon. They inflated the balloons then used cotton balls to dab a little veggie oil on the dark spot at the top of the balloon. This helps the skewer go through the rubber. The students then applied just a little pressure while twisting the skewer. Most were able to get the skewer into the balloon.
If you like a challenge, try getting the skewer all the way through the balloon and out of the bottom of the balloon.


Ooblek
Ooblek is simply a mixture of cornstarch (a polymer) and water (1 part water to 2 parts cornstarch). You can add a few drops of food coloring if you like.
The fun thing about ooblek is that it is a non-Newtonian fluid (a dilatant) that has properties of both solids and liquids.
Non-Newtonian fluids
Fluids are substances that can flow. They have a property called viscosity which describes the thickness of any fluid and its resistance to flowing. Sir Isaac Newton believed that the viscosity of a fluid could only be changed by changing its temperature. Those that change viscosity due to temperature changes (water, oil) are Newtonian fluids. However, you can change the viscosity of some fluids by applying a force. These are the non-Newtonian fluids. Pushing or pulling on the ooblek changes its viscosity.

Fake Snow
Our fake snow looked more like slush but it was still fun to make!
The students mixed a polymer called sodium polyacrylate with water. Sodium polyacrylate is known as the "diaper polymer" since it's used as an absorbent material in disposable diapers.


Bouncing Polymer Ball
I think we needed to make a bigger batch of this to make bouncy balls with. The stuff we ended up with was not enough to form anything with. It did make a nice slime material, though!
The students mixed 2 tbsp. of warm water with 1/2 tsp. of borax in a cup. We poured 1 tbsp. of school glue into a separate cup then mixed 1/2 tsp. of the borax mixture into the glue. The students added 1 tbsp. of cornstarch to the glue-borax mixture and stirred well.
Doubling the materials used would probably be enough to create a ball. Just mix until it becomes too stiff then pull the mixture out of the cup and mold it into a ball shape with your hands.

Here is the history of Silly Putty:
http://chemistry.about.com/od/everydaychemistry/a/sillyputty.htm

Next week:
Chemical reactions and solutions.

References:
I found lots of information about polymers on The Kids' Macrogalleria site. The Expanding Gummy Bears idea also came from this site.
There is so much more information that we didn't get to. I could spend weeks on this topic!

I found the Ooblek recipe here:
http://chemistry.about.com/od/chemistryhowtoguide/ht/oobleck.htm

The Fake Snow recipe came from this website:
http://chemistry.about.com/od/chemistryhowtoguide/ht/fakesnow.htm

You can learn more about the bouncing polymer ball project here:
http://chemistry.about.com/od/demonstrationsexperiments/ss/bounceball.htm

Remember these from last week?

Friday, March 4, 2011

March 3 - Changes and Phase Changes

We were supposed to re-try the "Pop Cork" lab from last week today but, as I was pulling in the parking lot at the school today I realized I had forgotten to bring the yeast. We'll try that one again next week. Hopefully I will remember the yeast!

We did still finish up the gas lesson from last week. I started out with a quick introduction to the gas laws: Charles' Law and Boyle's Law.
Boyle's Law. Robert Boyle was a British scientist who studied how gas pressure and volume are related. He found that as the volume of a container decreases, the pressure of the gas in the container increases. I gave the example of "pouring" a gas out of a 2-cup measuring jug into a baby food jar. The baby food jar is much smaller so, if we moved the gas from the jug to the jar, the pressure of the gas would increase. This is due to the tiny particles in the gas being pushed or compressed. They are forced to move closer together giving them less space to move around.
Boyle's law also tells us that if we were to move the gas from the baby food jar to the measuring jug, the pressure would decrease because those tiny particles have much more space to move.

Charles' Law. Jacques Charles was a French scientist who studied how the volume of a gas relates to its temperature. Charles' law states that as the temperature of a gas increases, the volume also increases. If the temperature decreases, then, the volume decreases. I used an example of a hot air balloon. As the temperature of the gas in the hot air balloon increases, the volume increases filling the balloon with air. To allow the balloon to land, the temperature and volume of the gas are both decreased.

Fading Color lab - This was one of the labs we didn't get to last week. It shows the effect of dry bleach on color.
For this lab, each student was given a baby food jar filled with water. They added two drops of food coloring to the water. The students then added one teaspoon of powdered bleach and stirred carefully. We let the jars sit and observed them periodically. The colors started to fade almost immediately; by the end of class they were much lighter!


1st photo taken immediately after adding the bleach; probably around 10:20.
Bleach contains oxygen. When the bleach and water were mixed, the bleach slowly started to give off oxygen gas. The combination of the oxygen and the dye caused the color to gradually fade.

2nd photo taken around 10:25. 
3rd photo taken around 10:35
Final photo taken after class (11:40). We really noticed a difference in the colors!
After finishing up the gas discussion and lab we moved on to today's topic: Phase changes.
I gave them a quick quiz to see what they remembered about the phases of matter. The students also discussed what they already know about how the phases can change (melting, solidifying, vaporizing, condensing). One student also knew about sublimation that we covered today. We spent some time discussing examples of each phase change.

Colder Water lab - In this experiment we saw the temperature of icy water become even colder.
We filled an empty metal can with crushed ice and then added water to cover the ice. The students added a thermometer to the can and we then waited 30 seconds before measuring the temperature. At this point, the temperature of the water was about 40 degrees F.
I then added 1 tablespoon of table salt to the icy water and stirred. We replaced the thermometer in the can and waited another 30 seconds. The students then recorded the new temperature and found it had lowered to just over 30 degrees F.
This happens because the salt requires energy to dissolve in the water. The salt gets that energy by removing heat from the water causing the temperature of the water to lower.

Frosty Can lab - This was another lab to show the effect of salt on the temperature of water.
We used the same can of salty, icy water from the Colder Water experiment. We added two more tablespoons of salt and stirred well. The students let the can sit and we watched as water condensed on the outside of the cold can. The amount of condensation increased as the can rested. Again, this is due to the salt taking heat from the water to provide energy for it to dissolve. If we left the can long enough, we would probably see a layer of frost form on the outside of the can.

Chilling Effect lab - Each student was given a thermometer and asked to blow their breath across the bulb about 15 times. They noticed the temperature of the thermometer had risen due to the heat of their breath.
We then moistened cotton balls with rubbing alcohol and rubbed the alcohol-soaked ball on the bulb of the thermometer. The students then removed the cotton ball and blew across the bulb another 15 times. We noticed that, despite the hot breath, the temperature of the thermometer was lower.
As the students blew on the thermometer, their hot breath caused the liquid in the bulb of the thermometer to expand (we spent a minute discussing what expand means). The liquid molecules move farther apart, causing the liquid to rise in the thermometer. The cool rubbing alcohol evaporated from the thermometer and takes energy away from the liquid in the bulb. As the liquid cools it contracts (again, we took some time to discuss the meaning of contract). The molecules of liquid take up less space and the liquid moves down the thermometer.

Sublime Sublimation
Sublimation is the process of a solid changing directly to a gas without going through the liquid phase. It can be seen easily with dry ice.
Dry ice is carbon dioxide in its solid form so, as it sublimates, it changes back into carbon dioxide gas. We reviewed what we already know about carbon dioxide - it's used to make drinks fizzy (carbonated beverages). Carbon dioxide is also the gas that is created in the vinegar-baking soda reaction.
Before starting these labs we went over some safety considerations for the dry ice. Carbon dioxide is heavier than oxygen so it actually removes/takes over the oxygen in the air. This is how CO2 fire extinguishers work. I told the students we'd go outside to complete most of the dry ice observations so we'd have plenty of ventilation. We also went over reasons why we shouldn't touch the dry ice with bare skin or taste it.
Observing Sublimation
1) I put a few pellets of dry ice into a styrofoam cup and then used a hair dryer to heat them up. The students were able to see the gas vapors coming off the pieces of ice. We found this worked a little better when I held the hair dryer at the side of the cup as opposed to at the top/opening of the cup.

2) We covered the cup/dry ice with some plastic wrap. We know the dry ice sublimates into a gas so we should have seen the plastic wrap puff up. It did a little but we were hoping for something more dramatic! :)

3) I lit a candle and "poured" the vapors from the cup with dry ice over the candle. Since carbon dioxide overrides the oxygen, the candle was extinguished (this again shows how the CO2 fire extinguishers work).

4) I placed a piece of dry ice on the ground and gave each student a towel and a penny. The students held the penny with the towel and then held the edge of the penny on the dry ice. This makes a great squealing sound!
We know carbon dioxide gas is released as the dry ice sublimates. When the students held the pennies on the chunk of dry ice, it caused that gas to become trapped. The gas pushed against the penny and caused the penny to vibrate/squeal.

5) We added some water to a cup with dry ice. This really showed the vapors/the dry ice sublimating.


One of the students asked what dry ice is used for. It's mostly used for refrigeration. Dry ice can be used if the power goes out so food doesn't spoil. It's also used in refrigerated trucks. Dry ice is also used in special effects and fog machines. We saw this with the water and dry ice.

We finished up class by making our own ice cream. It's very easy to make at home and uses minimal ingredients. Here's the recipe if you'd like to try this again. This makes enough for one person.
1/2 cup milk
1/2 tsp. vanilla extract
1 tbsp. sugar
4 cups ice
4 tbsp. salt
2 quart size zipper freezer bags
1 gallon size zipper freezer bags
Hand towels/gloves to keep your fingers warm

Mix the milk, vanilla, and sugar together in one of the quart size bags. Carefully squeeze out as much air as you can (to prevent the bag from bursting open) and seal it tightly. Place this inside the other quart size bag (we double-bagged to prevent salt and/or ice from mixing in with our milk mixture). Put the two small bags inside the gallon bag. Add the ice to the gallon bag and sprinkle salt on top. Squeeze out the excess air and seal the bag tightly. Now, shake the bag until the milk mixture starts to solidify. It can take anywhere between 5 to 10 minutes so patience is key.
*You can also add a little chocolate syrup to the milk and sugar mixture to make chocolate ice cream.


Why salt? That relates to the Colder Water lab above. The salt removes energy from the ice as it melts the ice. This causes the temperature of the liquid milk to lower and become more solid.

We ran out of time and didn't get a chance to discuss freezing, boiling, and melting points. Here it is so you can go over it at home if you'd like.
Phase changes occur due to a change in energy which changes due to a change in temperature. We know that for a liquid to change to a gas, we increase the temperature. The boiling point of water is 212 degrees F. Remember, though, that liquids don't need to boil to become a gas/vapor. Changing a solid to a liquid also requires an increase in temperature/energy. The temperature required to change a solid to a liquid is the melting point. The melting point of water is just over 32 degrees F. As we learned earlier, the freezing point of water is 32 degrees F. Salt and sugar have higher melting points than water which explains why it's easier to dissolve salt or sugar in hot liquids than cool liquids. For a gas to condense or change into a liquid, it needs to lose some of its energy or cool down. The dew point of water (the temperature at which the water vapor in the air changes to liquid) is just over 32 degrees F.

To look forward to next week:
Polymers! We'll discuss natural and man-made polymers. The students will make their own slime and will learn how to insert a toothpick into a balloon without popping it.

References:
The Colder Water, Frosty Can, Chilling Effect, and Fading Color labs are all from Chemistry for Every Kid.
VanCleave, J. (1989). Chemistry for Every Kid: 101 Easy Experiments That Really Work. San Francisco: Jossey-Bass.


I found the ice cream recipe on this website:
http://teachnet.com/lessonplans/science/plastic-bag-ice-cream-recipe/

The dry ice/sublimation ideas came from this website:
http://tlc.ousd.k12.ca.us/~acody/Dry_Ice.html

The students told me about the squealing pennies. Here's some more information on that topic:
http://www.seriouslyfunnyscience.com/node/73

Additional information on matter and states of matter:
Bose-Einstein Condensates. 
http://www.chem4kids.com/files/matter_becondensate.html
Well, it really is true that we learn something new every day! I had never heard of this type of matter. This state of matter was created in 1995 and is based on work (from the 1920s) by Satyendra Bose and Albert Einstein.
The students know plasma is very hot; gases have to be really excited (their temperature has to be increased considerably) for them to become a plasma. The Bose-Einstein Condensates, however, are very cold. The particles in this state of matter barely move at all.

More basics on matter and the states of matter.
http://www.chem4kids.com/files/matter_intro.html


http://www.chem4kids.com/files/matter_states.html

Chem4Kids is a really great website and includes all areas of science (and some math!) It's written in kid-friendly language, includes colorful graphics and charts, and makes a great complement to the wonderful (home school-friendly) activities and experiments in the Janice VanCleave books.

Tuesday, March 1, 2011

February 24th - Gases

We continued last week's study of the phases of matter by spending more time discussing gases.

To start out, I asked the students what they remembered about gases from last week's class. Do they have a definite volume? What about a definite shape? Are the particles packed close together? Do gases take up space? We discussed the reasoning for the answers to each question.

Dry Paper lab - This lab proved that even though we can't see gases, they do take up space. Each student was given a plastic cup and a piece of notebook paper. They wadded up the paper into a ball so it fit into the bottom of the cup (if you try this at home, make sure the paper has a snug fit and cannot fall out). The students then turned the cups upside down and submerged them in a bucket of water. They were very careful to push the cups straight down into the bucket and to lift them straight out without tilting the cups.
The paper was dry when the students removed it from the cups. Air fills up the cup on top of the paper and prevents water from entering the cup and getting the paper wet.

We spent a little time talking about oxidation. I asked the students what would happen if I left some newspaper on the back window ledge of my car. They knew it would turn yellow. This is actually the opposite of most reactions involving oxygen. Oxygen can be used as a bleaching agent so you would think adding oxygen would turn something white, not yellow. Newspaper is a little different. The materials used to make newspaper are actually yellow. Chemicals are then added that remove oxygen from the newspaper and turn it white. Sunlight heats up the air and acts as a catalyst for the reaction between oxygen in the air and those chemicals in the paper. This reaction then causes the paper to turn back to its original yellow.
We also did a quick demonstration of oxidation of fruit. I cut an apple in half and set one half off to the side. We squeezed a little lemon juice on the other half. When fruits such as apples, bananas, and pears are peeled, cut, or bruised, their cells are broken. Chemicals released by the broken cells react with oxygen and result in the brown color. Vitamin C or the citric acid in lemon reacts with the oxygen before it can react with the chemicals in the fruit, preventing the discoloration.


I asked the students to name any gases they could think of. We also talked about the gases that make up earth’s atmosphere (oxygen, nitrogen, argon, carbon dioxide, and water vapor). We looked at the periodic table of the elements and I showed the students how to identify the gases.

Last week, we learned that all matter is made up of smaller particles. These can then be split up into three groups: positively-charged protons, neutral neutrons, and negatively-charged electrons. I showed the students how to use the periodic table to find out how many of each particle an atom of different elements has.
Protons. To find the number of protons, just look for the element’s atomic number. This is usually located above the symbol. Oxygen, for example is 8, argon (Ar) is 18, and helium (He) is 2.
Neutrons. To find the number of neutrons, subtract the atomic number from the element’s atomic weight. The atomic weight is the number (usually a decimal) underneath the element’s name. Oxygen’s atomic weight is 15.9994. The students knew we could round that up to 16. This means oxygen has 8 neutrons. Argon has an atomic weight of 39.948 so it has 22 neutrons. Helium’s atomic weight is 4 giving it 2 neutrons.
Electrons. The number of electrons is related to the group that each element is found in. There are 8 main groups on the periodic table (look at the Roman numerals with A after them at the top of each column). Elements in group I such as hydrogen, sodium (Na), and potassium (K) all have one outer electron. Oxygen is in group VI so it has six outer electrons.

We moved on to talk about some special groups on the periodic table. Two of the gases, fluorine (F) and chlorine (Cl), are part of the halogens. These are elements in group VII and they like to join with elements from group I. We talked about how sodium from group I likes to join up with chlorine from group VII to form table salt, NaCl. Another special group are the noble gases. These are group VIII. Compounds like to have eight outer electrons so the noble gases do not like to join up with other elements. They already have 8 electrons in their outer shell since they are in group 8. I spent a little time showing them some other combinations of elements and how they like to join up to have 8 outer electrons. I drew dot diagrams for salt and water on the board to show the 8 total electrons.

Escaping Bubbles lab – The students were given a baby food jar filled halfway with soda. We placed the jars on the table and watched the bubbles rise to the top of the jar. We discussed how soda (and other fizzy drinks) are made with carbon dioxide gas. That’s where the word carbonated, as in carbonated water, comes from. Large amounts of carbon dioxide are dissolved in water. This high volume of gas is compressed into a relatively small space (a soda or Perrier bottle) and is immediately sealed so the gas is under high pressure. When the lid is removed, the gas starts to escape right away (that “pssssh” sound is the pressure being released). The bubbles the students observed were bubbles of CO2 gas that was escaping the open baby food jar.

Foamy Soda lab – This lab showed effervescence, a fancy word for replacing a gas with another substance.
The students kept the baby food jars and soda and added a teaspoon of salt to the liquid. They watched as foam erupted from the jars. Since salt and carbon dioxide are both examples of matter, we know they both take up space and that they can’t be in the same space at the same time. One has to move! The salt pushes the lighter gas out of the way causing lots of carbon dioxide bubbles to move to the top of the jar at the same time. The moving gas creates the great foam that the students observed.

Escape lab – This was another lab to show the removal of carbon dioxide from soda. For this, we placed a balloon around the open mouth of a bottle of soda. The students gently shook the bottle and then set it on the table. We watched as the balloon inflated.
We know the particles in gases are spaced far apart and have plenty of room to move around. Shaking the bottle of soda excited the gases causing their particles to move around even more. The open bottle, as we saw in the last two labs, allowed the excited gas to escape and the pressure from the gas caused the balloon to inflate.


How Long? lab - For this, we set up a pipe using a piece of clear plastic tubing, some clay, a jar, and a soda bottle. We then poured some water into the soda bottle and added a broken up Alka-Seltzer tablet. We placed a little of the tube into the soda bottle and sealed it up with the clay. Water was added to the jar and the free end of the tube was placed into the water in the jar. The students then watched as bubbles traveled through the tube into the water in the jar. OK, so we couldn't really see the bubbles travel along the tube but they did see the water in the jar bubbling. Very cool one to try at home.
The combination of Alka-Seltzer and water creates carbon dioxide which is the gas the students were able to see bubbling in the jar.


We tried one more lab but didn’t have much success with it (most likely due to teacher error!) We’ll try this one again next week since I’m sure it’s really cool when done correctly. J
For this, we’re going to attempt to shoot a cork from a soda bottle. We will add some dry yeast and sugar to warm water inside a soda bottle. We’ll then place a cork in the mouth of the bottle and let the yeast do its thing. Hopefully, the carbon dioxide that is produced by the yeast will build up enough pressure to pop the cork from the bottle.

 Our un-popped corks! I hope we have better luck next time.
To look forward to next week:
*The Pop Cork lab detailed above.
*Fading Color lab – we ran out of time for this. It will show the oxygen gas in bleach.
*We will discuss phase changes and make ice cream!


References:
The labs "Dry Paper," "Escaping Bubbles," "Foamy Soda," "Pop Cork," and "How Long?" are all from Chemistry for Every Kid.
VanCleave, J. (1989). Chemistry for Every Kid: 101 Easy Experiments That Really Work. San Francisco: Jossey-Bass.
The lab "Escape" is from 200 Gooey, Slippery, Slimy, Weird, and Fun Experiments
VanCleave, J. (1993). 200 Gooey, Slippery, Slimy, Weird, and Fun Experiments. New York: John Wiley and Sons, Inc.


Some photos from Mrs. Kole's origami class.