I moved on to ask if the class had ever seen gymnastics on TV. I asked if they had seen the gymnasts rub a white powder on their hands. Ballet dancers will often rub the same powder on the bottom of their shoes before dancing on a smooth floor. I asked the students why they do this. Gymnasts and dancers use rosin to create friction between their skin or shoes and the floor or gym equipment. This creates more grip for them.
Friction is a force that opposes motion between two surfaces that are touching each other. In other words, friction is what happens when two things rub or roll against each other. This could be your two hands rubbing together, skis rubbing on the snow, or a hammer hitting a nail. When two objects are touching, their surfaces tend to stick together like the tiny loops and hooks of Velcro.
Would you expect more friction between an oily floor and a slick leather shoe sole or between a rough sidewalk and the bottom of a tennis shoe?
The amount of friction depends on two factors: The kinds of surfaces and the force pressing the surfaces together.
Sliding Friction: This is what we observed when we pushed the textbook across the table. Sliding friction is caused by two objects touching each other and sliding past one another.
Rolling Friction: This uses wheels. Only the bottom of each wheel is in contact with the ground/road so rolling friction is less than sliding friction. The students each rolled a toy car across the table and observed how quickly it was able to move.
Fluid Friction: When an object comes in contact with a fluid (in the form of a liquid or gas), it is considered fluid friction. Airplanes and race cars are streamlined to reduce fluid friction. They have smooth, curved surfaces to reduce the friction, known as drag, with the air.
We completed three experiments to demonstrate rolling and sliding friction as well as the effect of weight on friction.
1) Roller lab.
For this experiment, the students each had two books. They tied a piece of string around one of the books and then tied a rubber band onto the end of the string. The students placed a second book on top and then moved the books by pulling on the rubber band and measured how far the rubber band stretches.
Each student was then given ten round markers. They used the markers to make "wheels" for the books and tried the experiment again. New measurements were taken and we compared the results.
The rubber band stretched more when the bottom book was placed flat against the table than when it was placed on the pens. This showed that things that roll cause less friction than things that slide.


2) Farther lab.
This lab showed the effect of weight on the energy of a moving object.The students were given two books, 1 small round jar, and 1 large round jar. They set the books up with the edge of one book on the second book in order to form an incline. The students then placed the small jar at the top of the incline and let it roll down. We used a tape measure to see how far the small jar rolled then repeated the experiment with the larger jar.
The larger, heavier jar rolled farther than the smaller, lighter jar. The friction of the books, air, and floor remains constant during the two experiments. The major difference in this experiment, then, is the weight of the two jars. As the weight of a rolling object increases, its energy increases. This means the heavier jar has more energy and will roll farther than the smaller jar.


3) Wobbler lab.
This lab also involved a jar and books that we used to form an incline. Before we started, I had the students predict if an empty jar or a jar with water would roll farther. They predicted the heavier jar with water would go farther. The students started out letting the empty jar roll down the incline. They then measured how far the jar rolled. I then filled the jar about three-quarters full with water. After securing the lid, the students then let the jar roll down the incline and measured the distance it rolled.Contrary to what they learned in their last lab, the heavier jar in this experiment did not roll as far. :)
In this lab, the friction of the jar did not remain constant. The water in the jar sloshed around, increasing the friction inside the jar. It takes more energy to move the jar with the water swishing around inside.
We wrapped up our discussion of friction by talking about the advantages and disadvantages of friction and then completed one last friction-related lab.
How Far?
This lab showed how the texture of a surface affects motion.The students were each given a piece of poster board, a piece of wax paper, and a piece of sand paper. They also each had a bottle of glue, a rubber band, some string, and a paper clip. I had pre-cut the poster board with a small horizontal slit to hold the paper clip and then attached the rubber band to the paper clip. The students looped the string through the rubber band and placed the poster board on the table. They placed the glue bottle at the end of the poster board and then pulled the string just enough to straighten the rubber band.
They then pulled the poster board along three different surfaces (the table, the sand paper, and the wax paper) and measured how far the rubber band moved each time.
The wax paper had the least amount of friction so the rubber band stretched the least when the poster board was placed on this surface. The sand paper had the greatest amount of friction, causing the rubber band to stretch a lot.


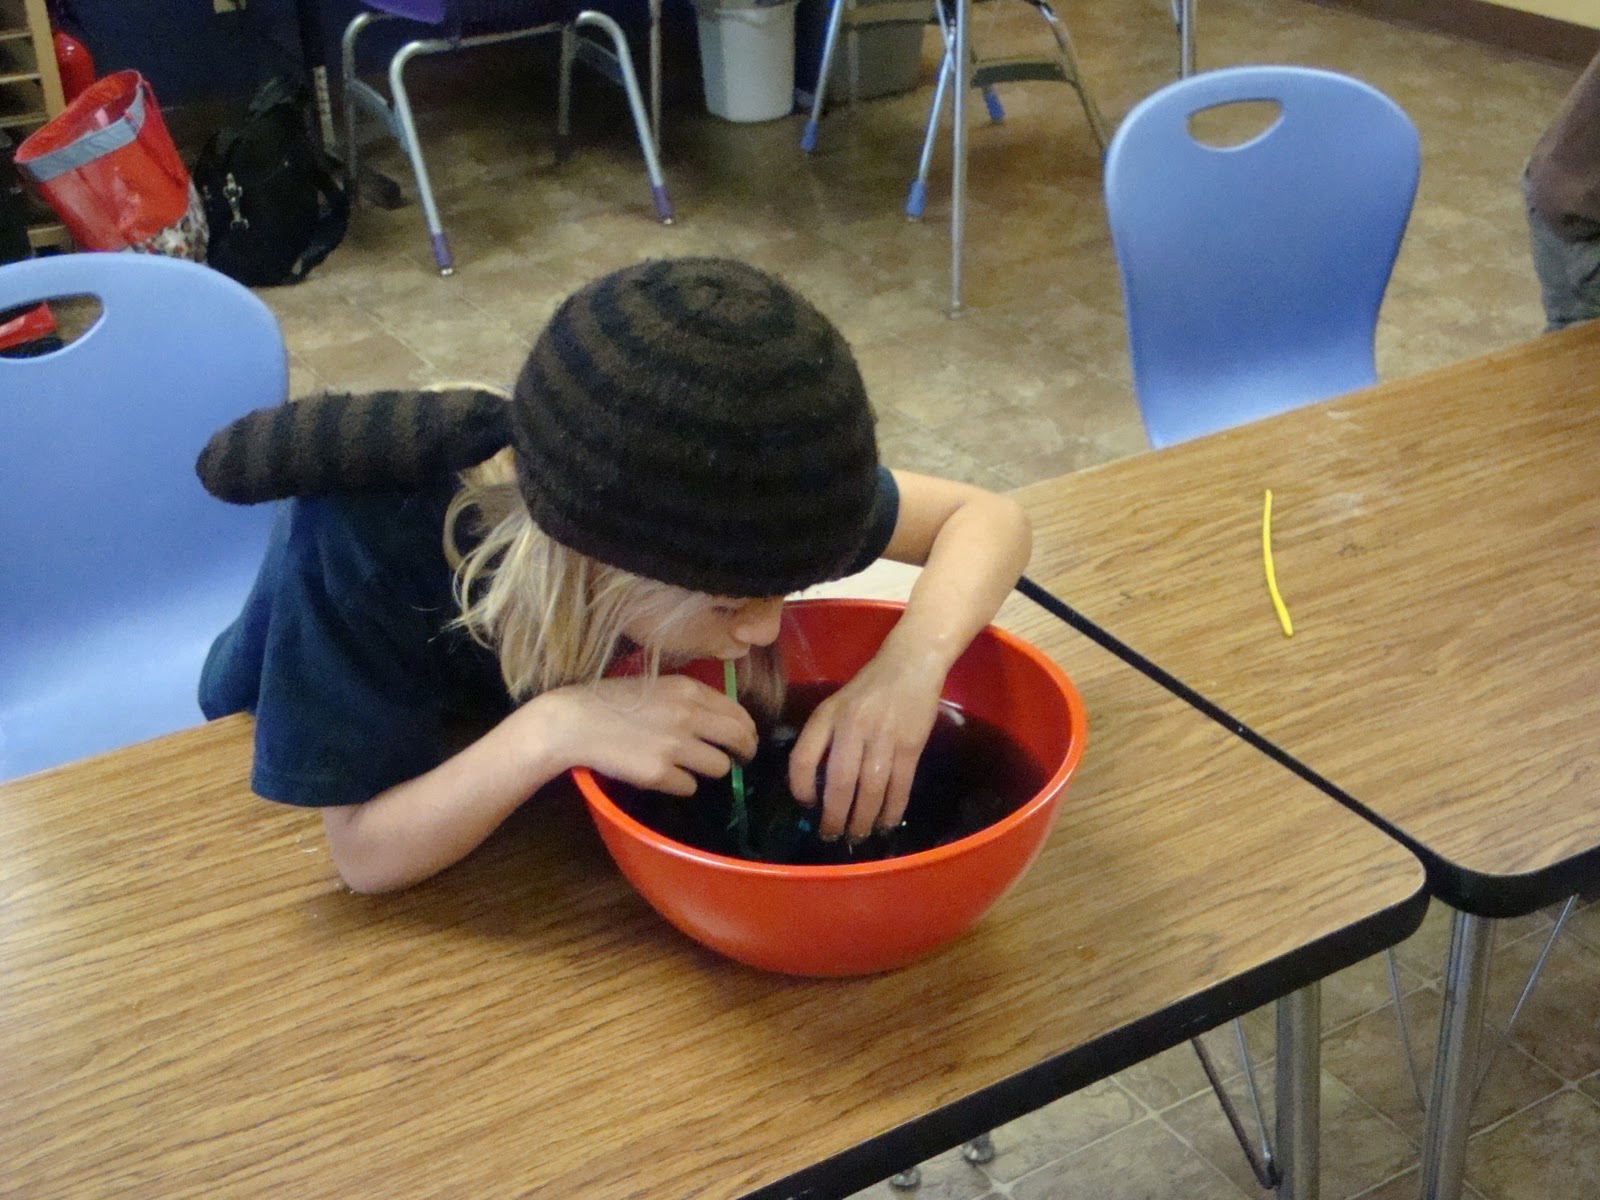
Baby carrot submarines.
This was a lab we didn't get to last week so I'd made myself a note to do this one at the beginning of class today. I got all excited about teaching friction that I completely forgot! Luckily, we had a few minutes at the end of class today to complete this buoyancy experiment.Parents may remember those little plastic submarines that used to come in cereal boxes (I know my siblings and I had quite a few!) This is a really fun experiment to try at home.
Cut a baby carrot in half then use a flat-head screwdriver to make a hole in the cut side of the carrot. Break two toothpicks in half and insert the pieces in the rounded part of the carrot (2 on each end).
Fill the hole in the carrot with baking powder and then place your sub in a bowl of room-temperature water.


At first, the carrot submarine is more dense than the water. However, when the baking powder and water react, they produce a gas (carbon dioxide) that is less dense than the water. This causes the carrot to rise to the surface. When the bubbles dissipate, the carrot will sink back to the bottom. This will continue until all the baking powder is gone.
Reminder: There will be no class next Thursday, November 11th, in honor of the Veterans Day holiday.
To look forward to on November 18th: Kinetic and Potential Energy; The Law of Conservation of Energy
The labs "Roller," "Farther," "Wobbler," and "How Far?" are from Physics for Every Kid.
VanCleave, J. (1991). Physics for Every Kid: 101 Easy Experiments in Motion, Heat, Light, Machines, and Sound. San Francisco: Jossey-Bass.
I found the baby carrot submarine directions on this website:
http://www.coolscienceclub.tripod.com/baking_powder_submarine.html